

Health & Safety Warning – This blog DOES NOT provide personal safety advice about the load bearing capacities of garden structures. This is NOT a ‘how to’ blog. This blog simply sets out the method I used to create a garden on the roof of a shed I designed and built by hand from scratch, in full knowledge it would need to hold the weight of my planned roof garden with ease. My shed was a bespoke design and build from the ground up. The type and size of wood I used is deliberately not included in this blog, and neither is the build design nor the method of construction. The focus is on the roof garden itself, not the materials or the structural integrity of the shed. If you take on any project that involves adding weight to the roof of any structure, be absolutely certain about what you are doing, and seek professional advice if you are in any doubt. There are no second chances when it comes to safety. If a shed roof collapses you risk serious injury to yourself, your family, friends and visitors to your garden. DO NOT just add a roof garden to a shed without being mindful about the safety issues involved. Off-the-shelf sheds are not built to withhold the weight of a garden on their roof. One cubic metre of soil is likely to weigh between 1.2 – 1.7 metric tonnes (1,200 – 1,700 kg). If you add on the weight of plants, plus the weight of water after heavy rain, there could potentially be 2 tonnes of weight on the roof. Only take on this type of build if you have experience of wooden framing under load, and only if you have the self-awareness to seek advice when unsure. Don’t try to cut corners to save money. This type of solid structure is not a cheap build. My 2015 roof garden shed is 4 metres long x 2 metres wide x 2.5 metres high. The materials, including a secure double glazing sliding door, wood, insulation, liners, guttering, soil and plants cost in the region of £3,000.
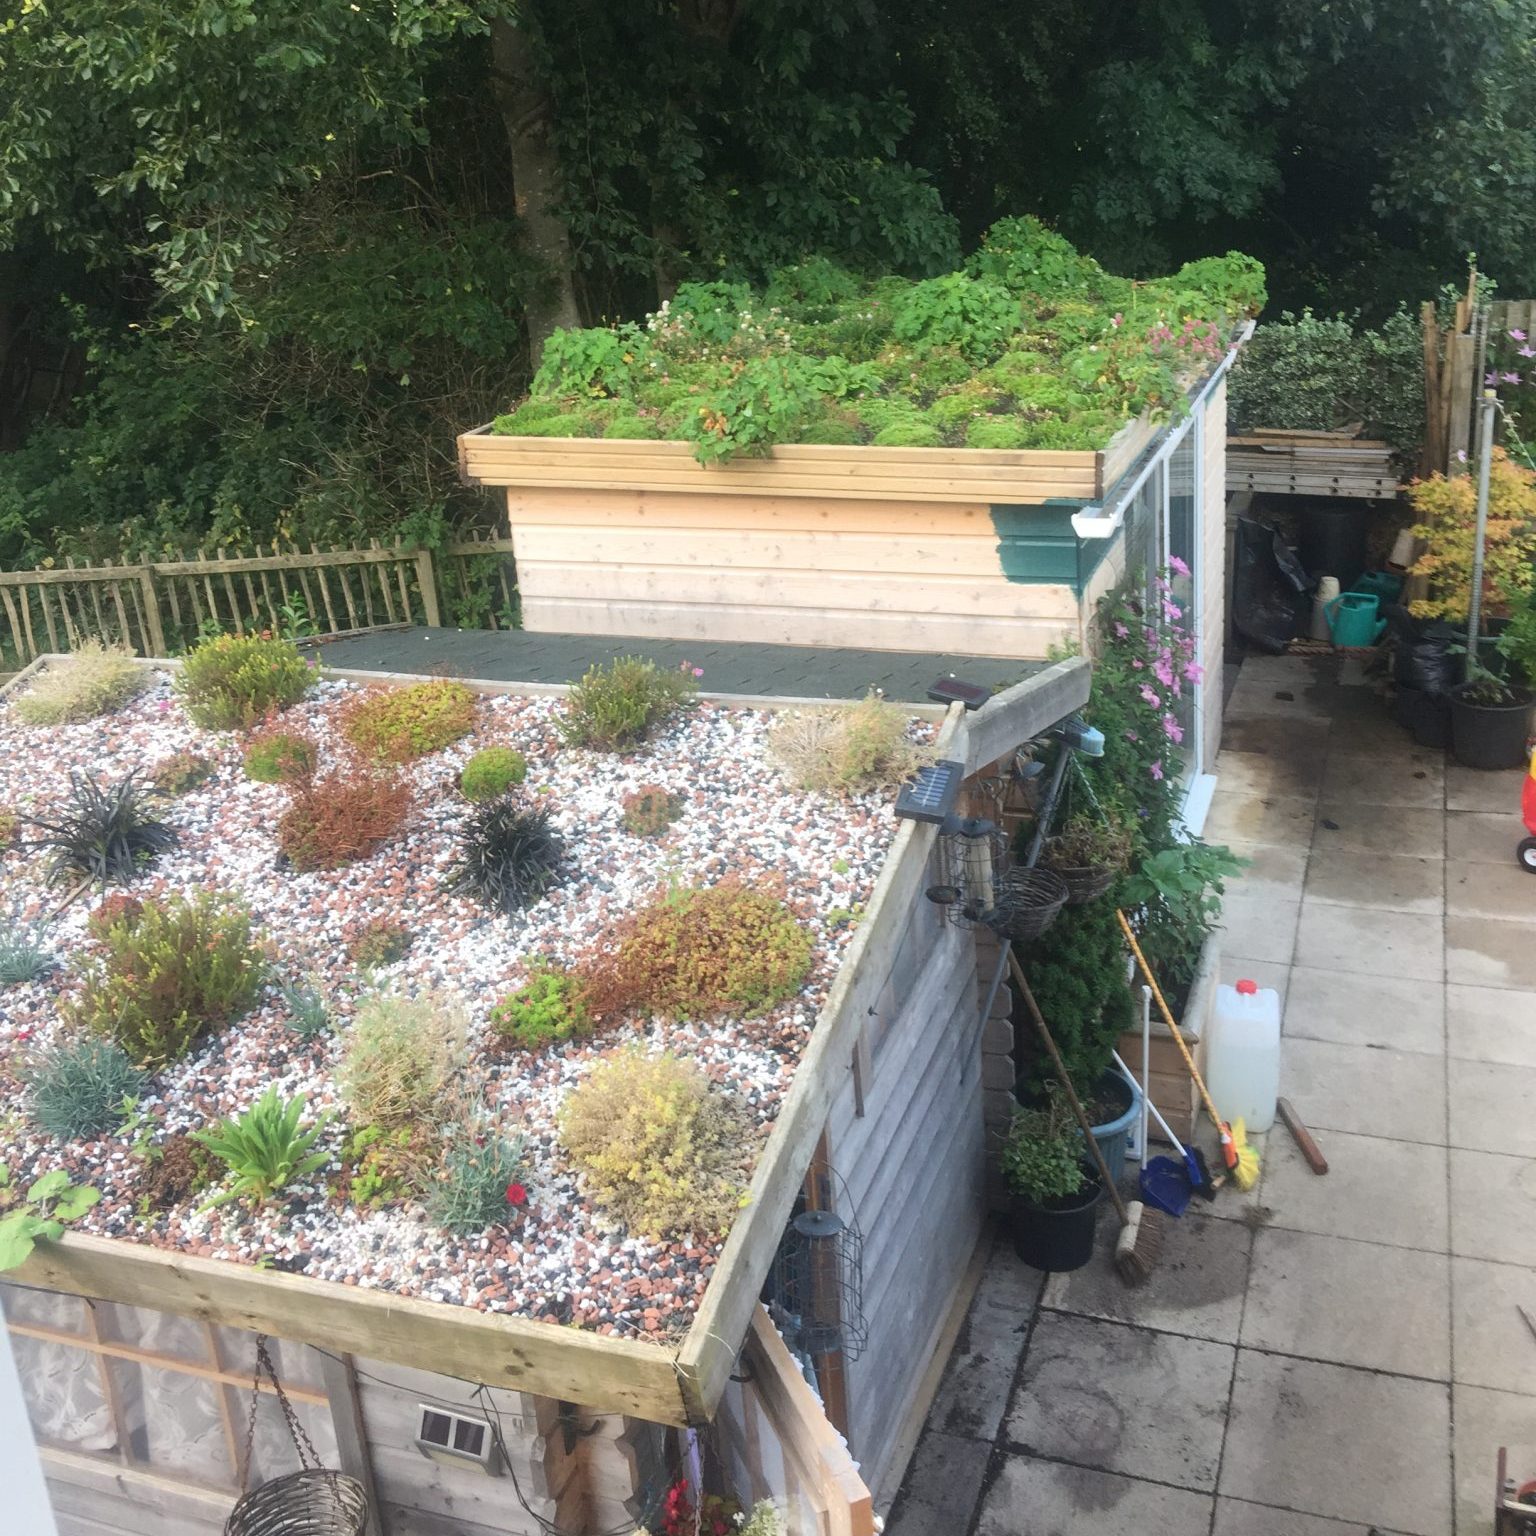
In January of 2013 the wind blew off one side of the roofing felt on one of our sheds. Instead of applying more felt, I decided to see if i could grow some plants on the roof. I strenghtherned the roof with battoning on the inside of the shed, both horizontally and vertically. I laid a double layer of green damp-proof membrane across one side of the shed, and put decking boards around the edge to hold the compost in. I mixed up bags of compost with bags of sand (70/30) and put them on the roof. The maximum depth was only about 10cm. I then covered the whole area with landscape fabric and applied a thin layer of decorative stone chips. I selected alpine plants in 9cm pots, and cut holes in the fabric to plant them into the shed roof. It worked! I didn’t know it at the time, but this roof garden and planting experiment would be the prototype to the larger shed and roof garden I went on to build in 2015.
I had grown lots of alpine plants in our garden, but never on top of a shed. Alpine plants are accustomed to growing on rocky hillsides, often with very little soil. I hoped the 9cm plants I selected would grow to 2 – 3 times their potted size, and they did. They seemed to like the south facing shed roof. I did need to water the plants in the height of summer. Any moisture that is in the soil does permeate down the inclined slope of the shed roof and drain out of the lower end of the decking boards. The landscape fabric and layer of decorative stone does help to prevent some water loss and drying out through evaporation. I added Dianthus, Primula Vialii, and Ophiopogon, and they did well too. I was really happy. There’s no direct correlation to the creation of our first shed roof garden, but later that year in April 2013 we set up our garden maintenance business in East Kilbride.
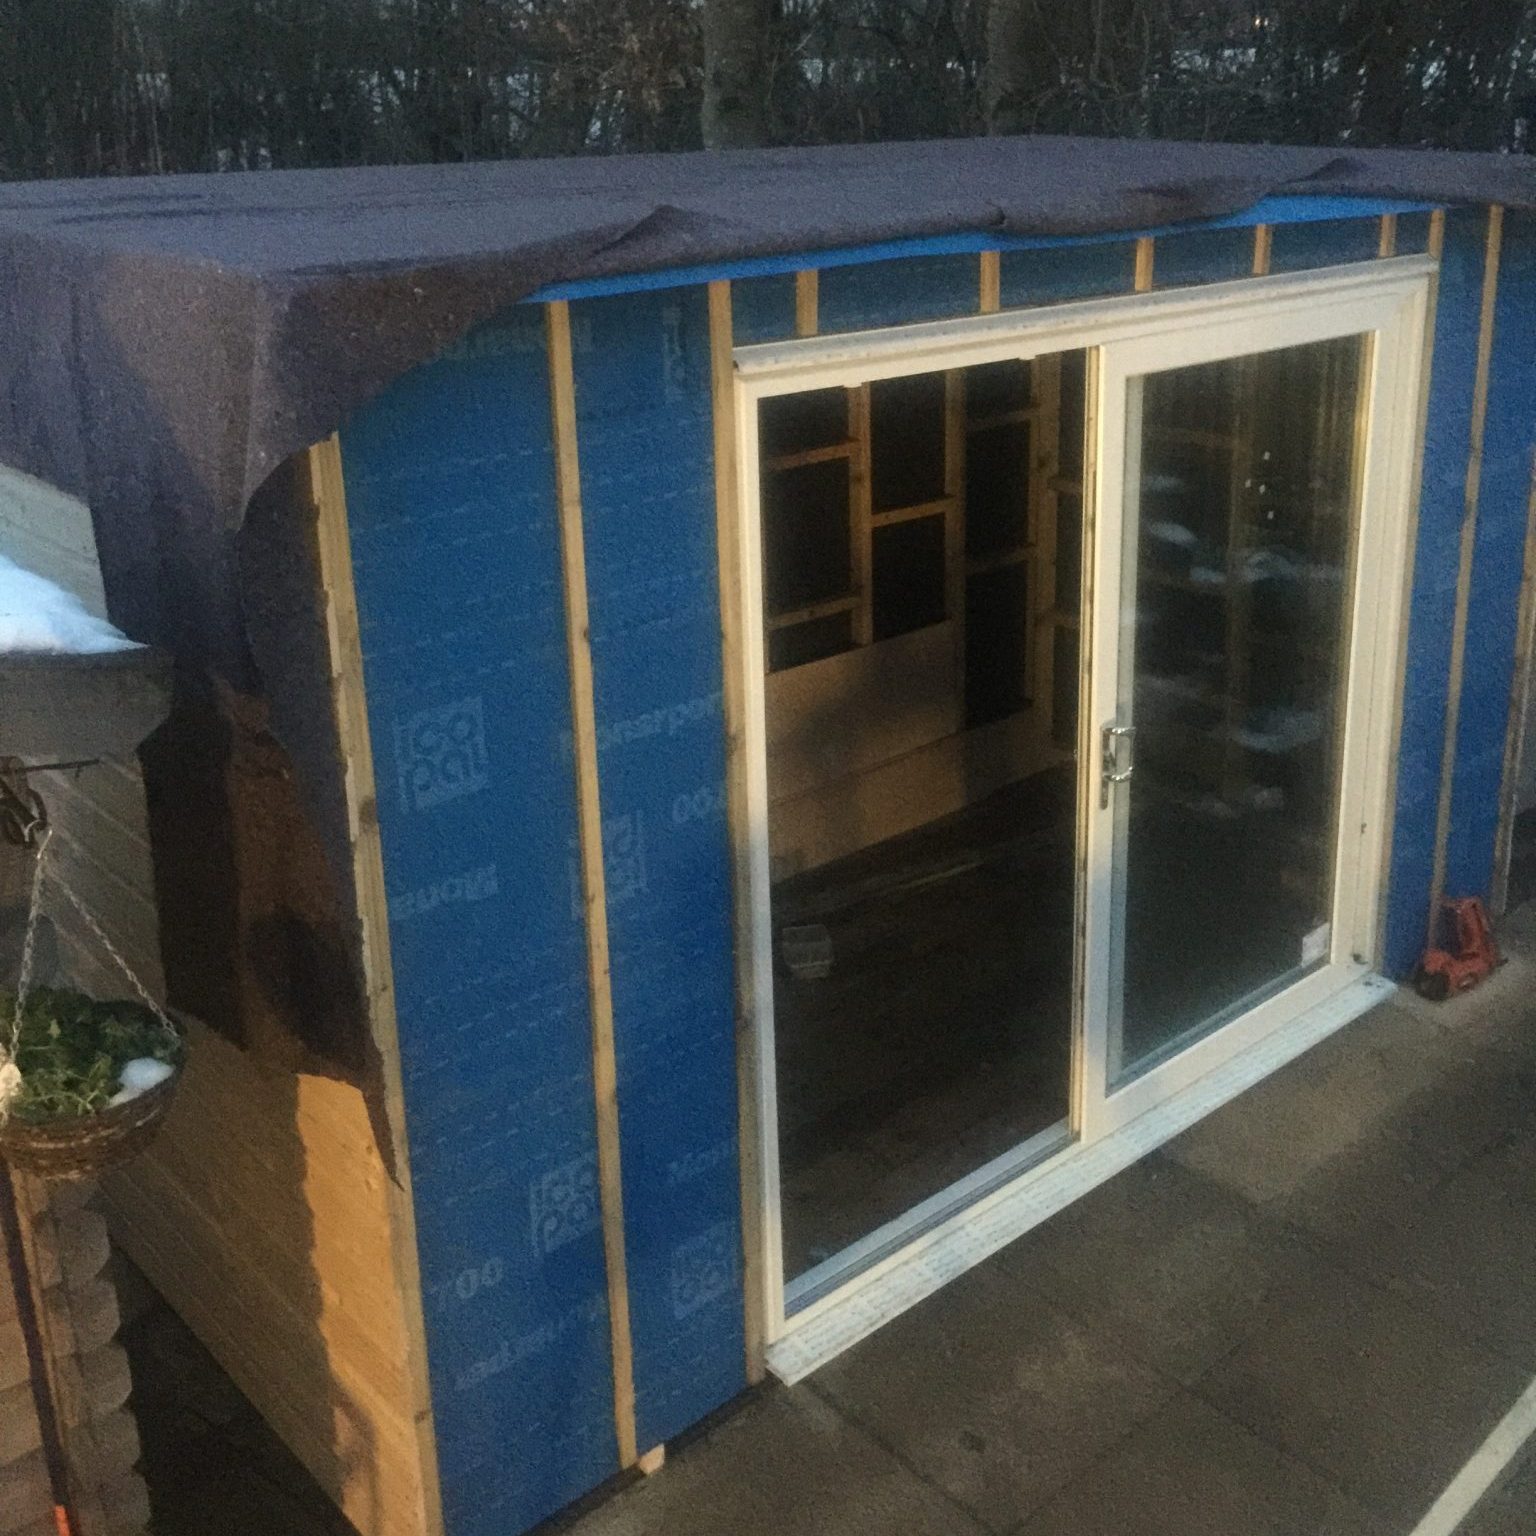
My first attempt at a shed roof garden in 2013 was such a success that in January 2015 I set about building a new larger shed with a roof garden. I decided I wanted less of an incline on the roof to ensure the water didn’t drain too quickly, but at the same time it did need an incline to ensure sufficient run off and drainage – I didn’t want a pond. Having said that, I did use some of the principles of building a pond in order to protect the shed. The first layer of protection I used on the roof was a blue vapour permeable membrane. I was using this around the walls of the shed so used what I had left on the roof. I then added a layer of pond fleece liner. This material is used to protect a pond liner from damage from stones when water pressure is forced down onto the liner when filled. Although I wasn’t building a pond of water, I still wanted to offer the liner and roof some added protection.
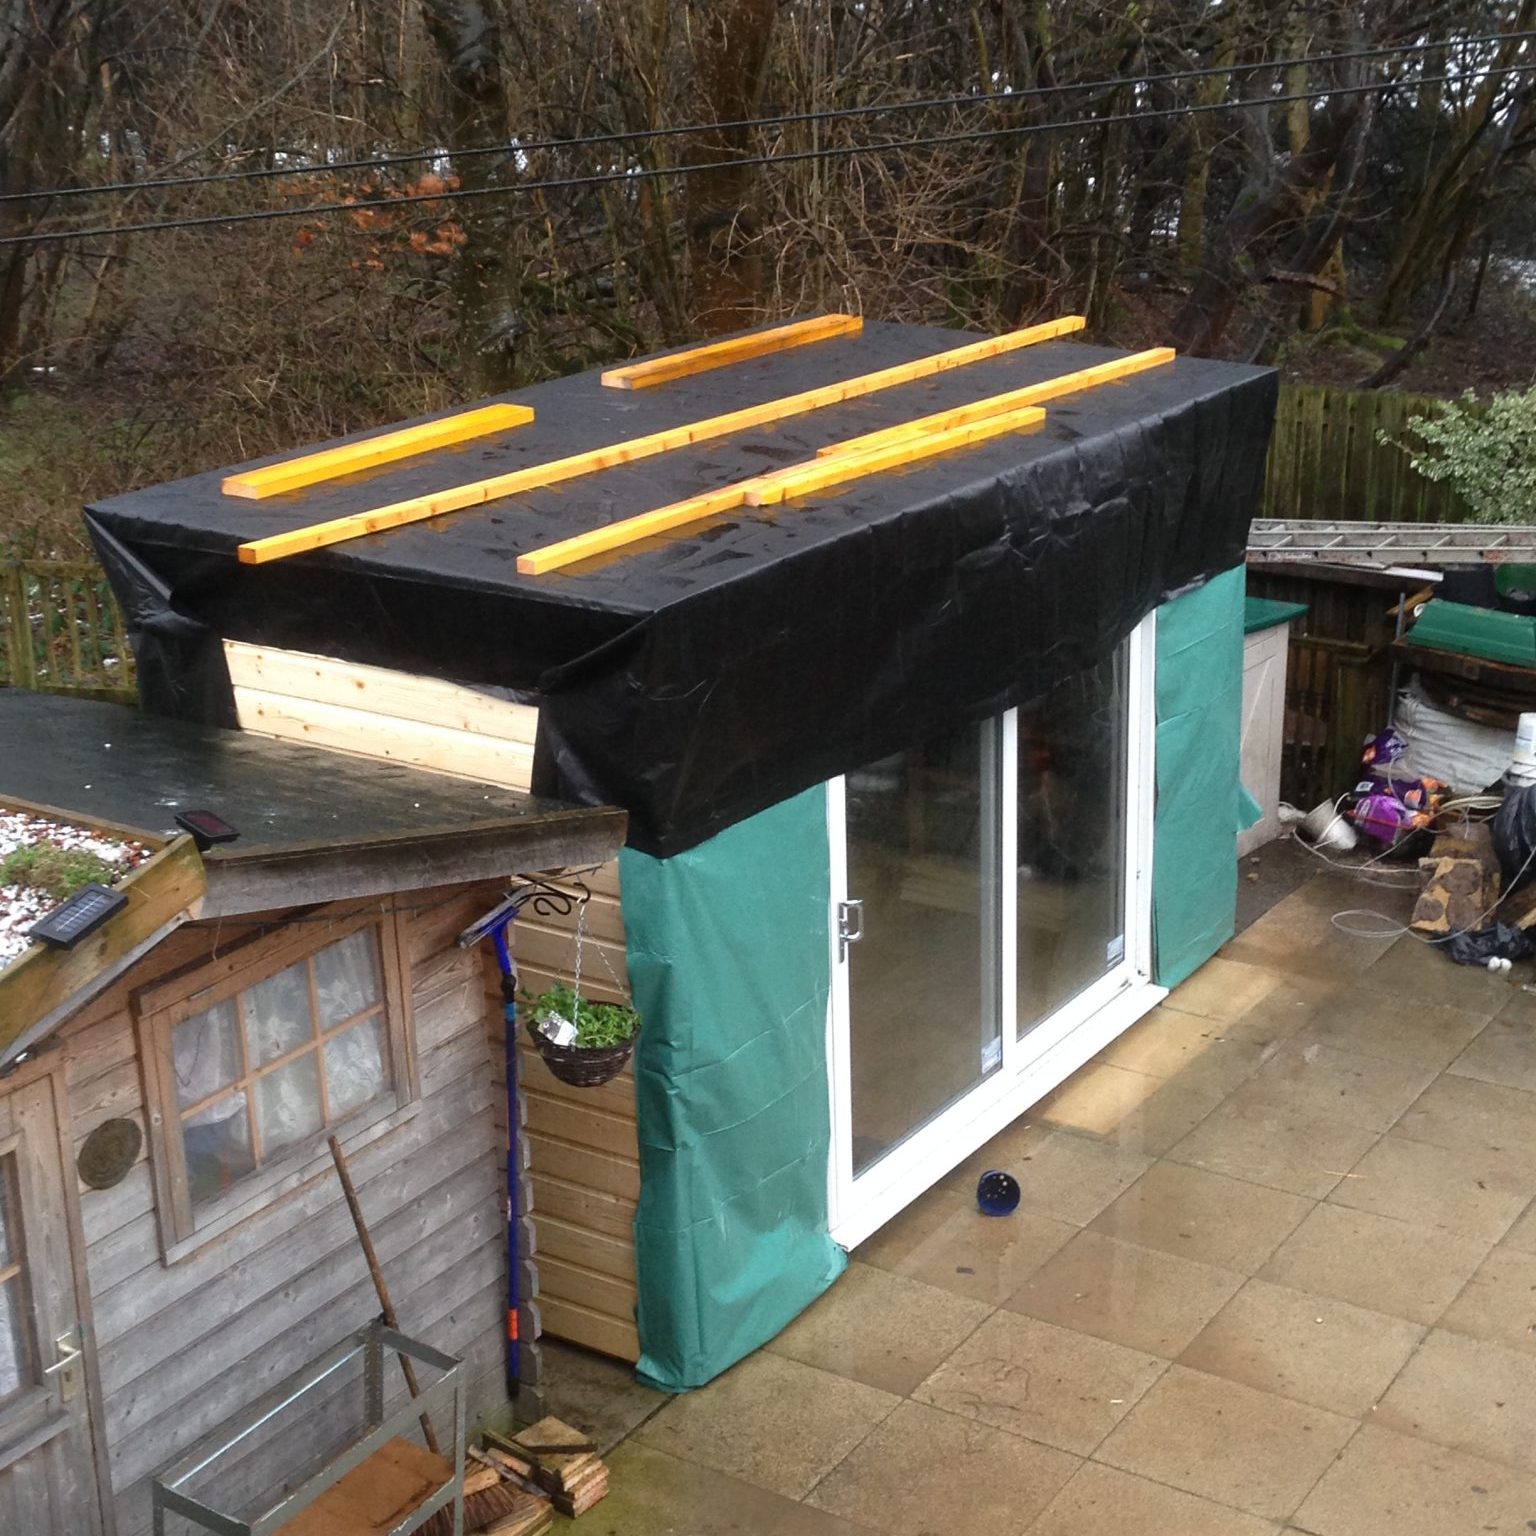
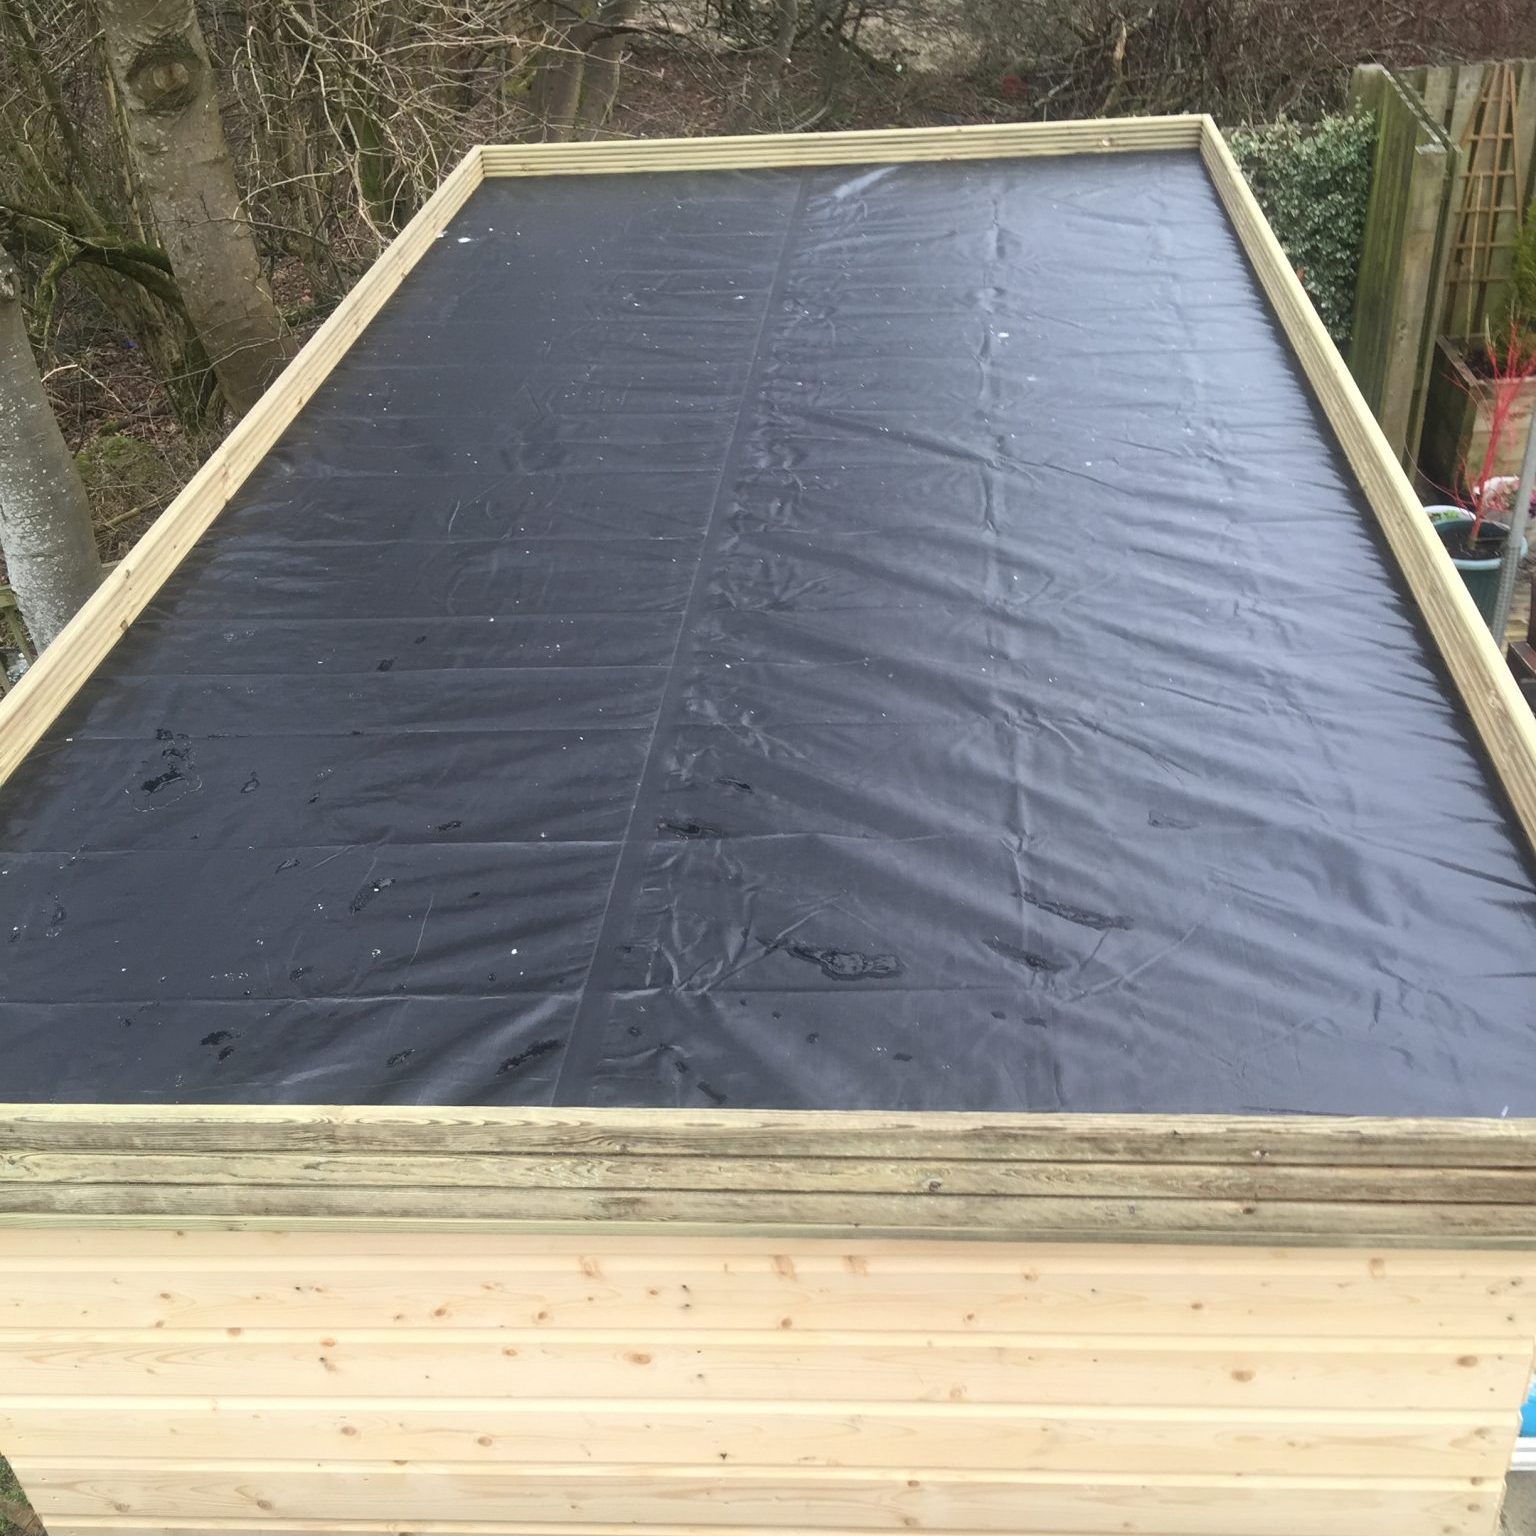
Once the pond fleece liner was in place I applied a pond liner to protect the roof from water ingress. Not all pond liners are created equal. They will come in various grades. I chose a liner with a 40 year lifespan. I used a staple gun to fasten my protective linings and pond liner to the underside overhang of the shed roof. It may seem obvious, but it’s worth noting, DO NOT staple through the top surface of the pond liner. If there is even a tiny hole, water will find its way through eventually. One mistake I did make was folding the liner under the overhang and fastening it too near the edge of where the roof met the wall. By doing so I didn’t leave a drip edge. Without a drip edge water runs around the liner and right up to the wall and roof joint. You don’t want this. Cut the liner so that the cut edge faces directly to the ground. That way the water will roll over the edge and drip down to the ground. I have since rectified this error and all is well.
With the liner in place I then attached the deck board edging. This would hold in the soil. From the surface of the roof to the top edge of the deck board there was a depth of 10cm. This was all I had on the 2013 shed roof garden, so I decided that was all I needed. Plus, any more depth and I would need more soil to fill it, and more soil meant more weight.
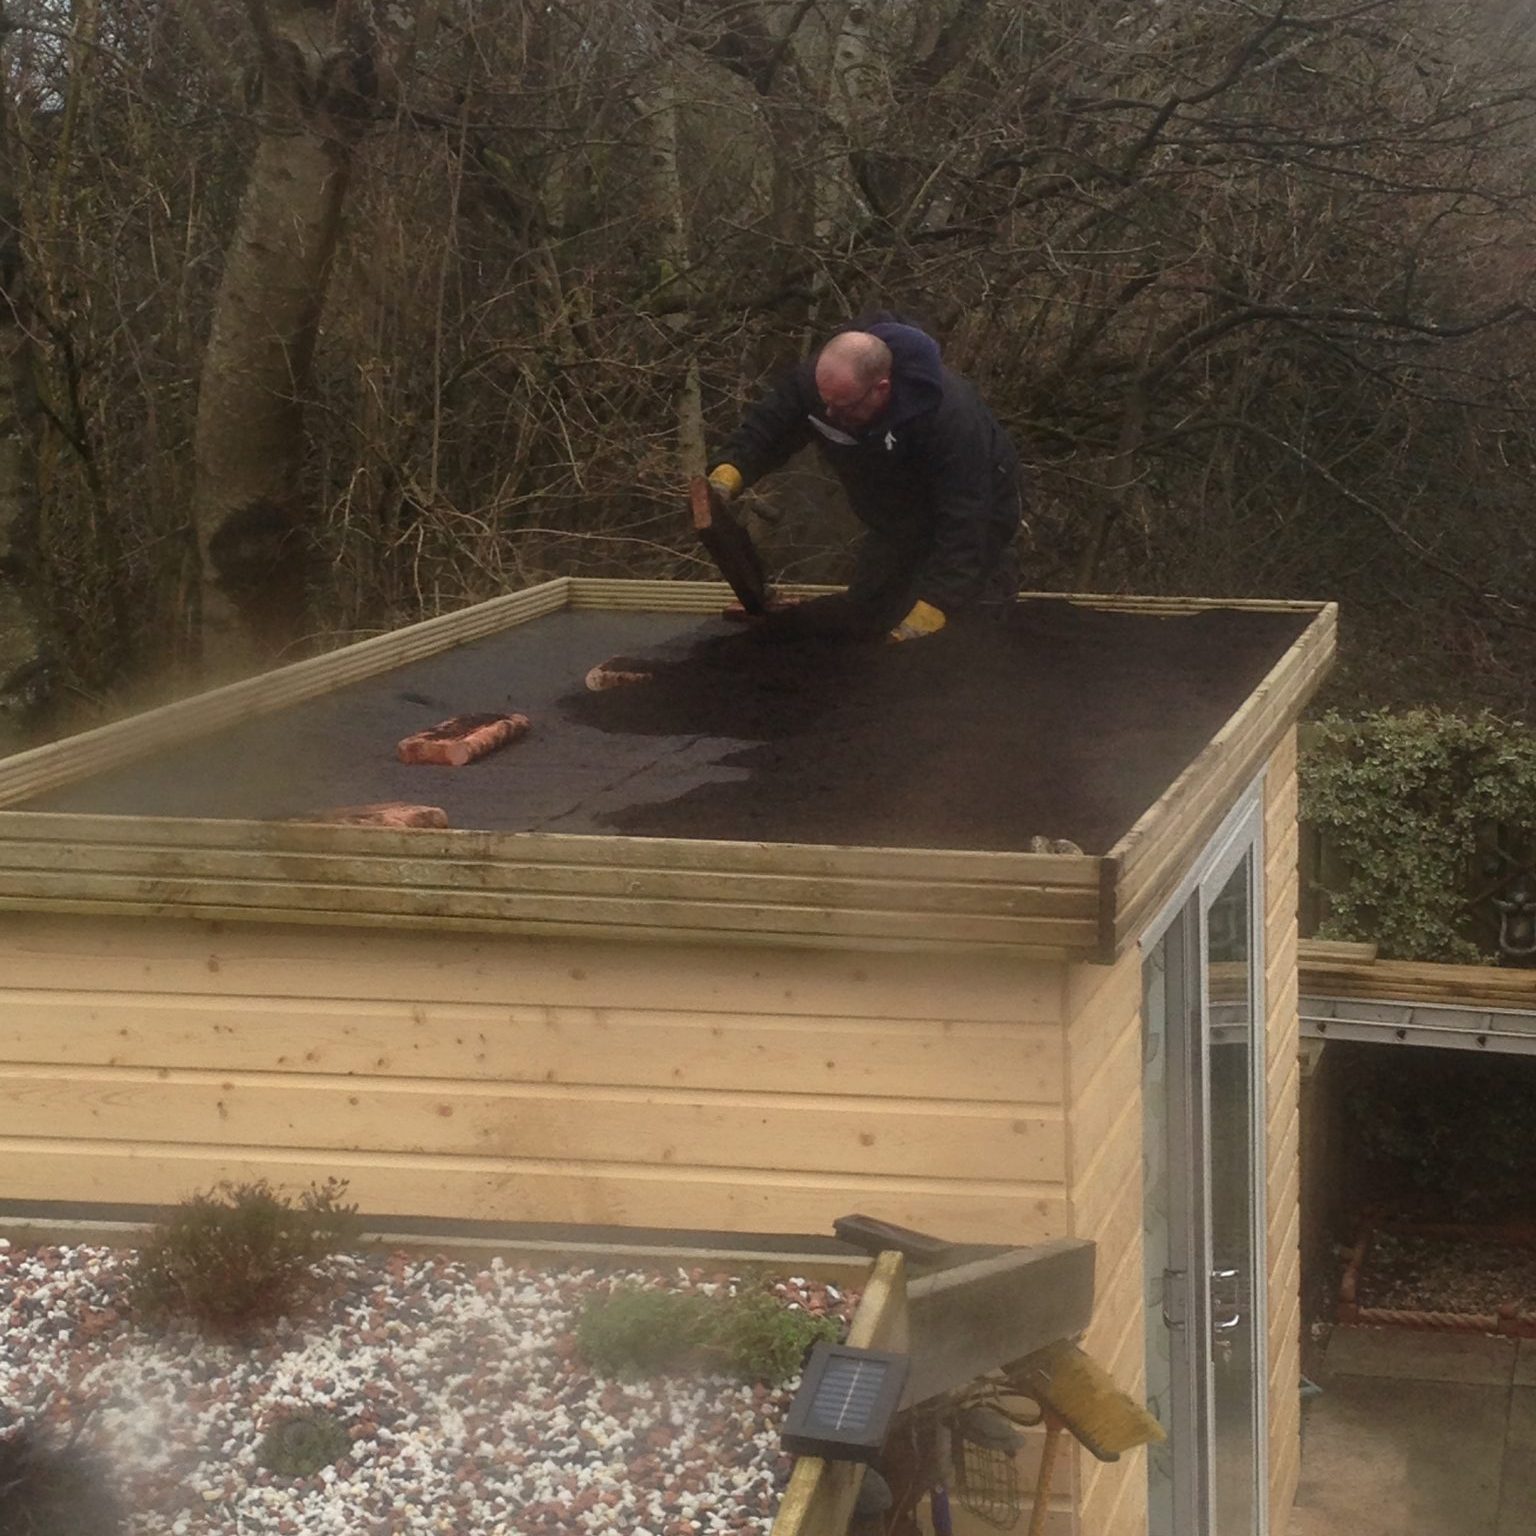
There was one more item to apply before adding the peat free composted soil – and that was water matting. Water matting is a horticultural product often used by commercial plant nurseries. It’s not to be confused with capillary water matting, that is also used widely in the commercial plant growing sector. The water matting I selected was a matting that is specifically designed to hold onto water. It will hold more than 5 litres of water in 1 square metre. In addition to these water retention qualities, I also wanted my plants to have something to get their roots into. I didn’t use this matting on the 2013 shed roof garden, and it was something I thought was lacking from this earlier prototype. If the roots grew into the matting, and the matting held onto water, then I was giving the plants the best chance at surviving and thriving. If you look closely you can just make out this water matting on the surface of the shed roof in the photo above where I am applying the soil.
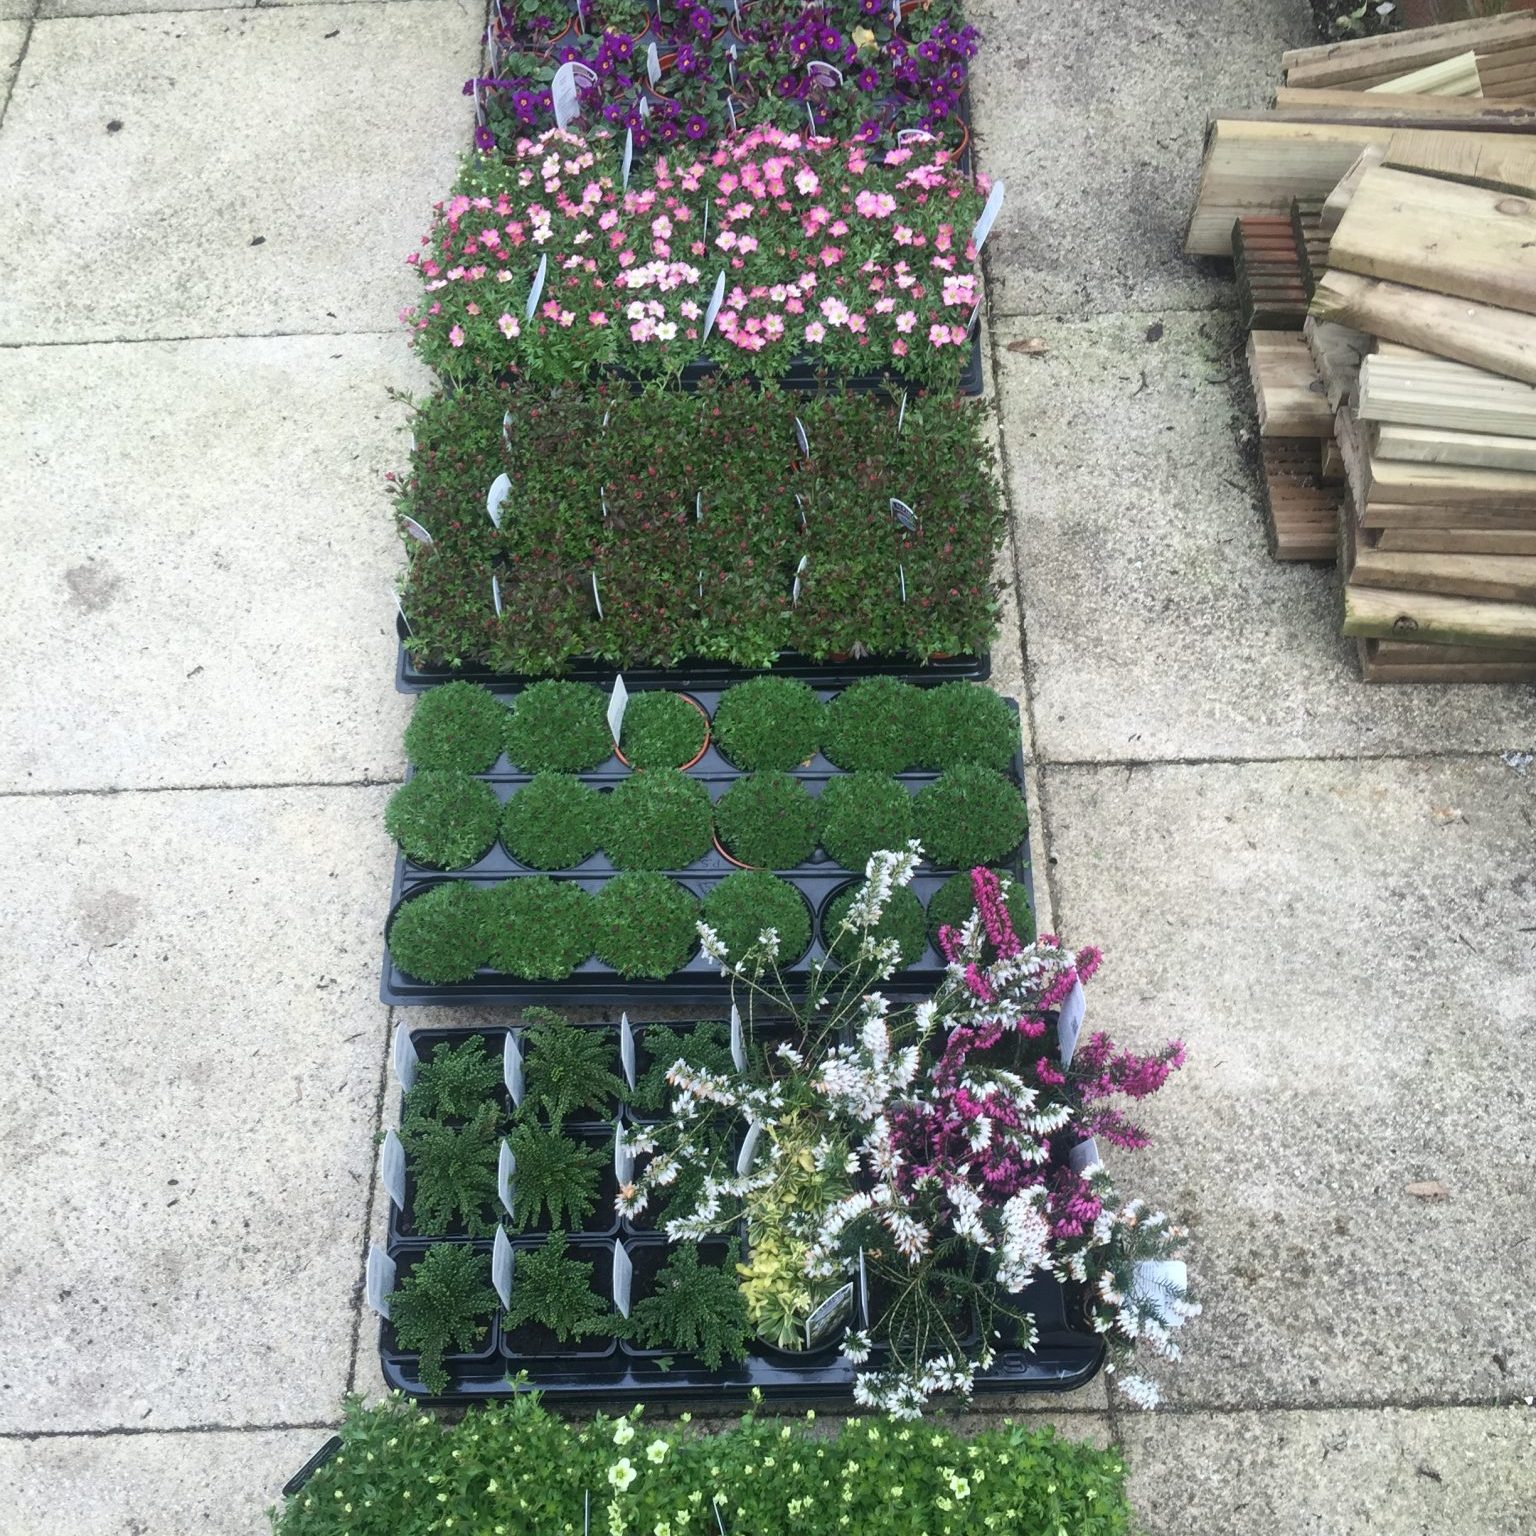
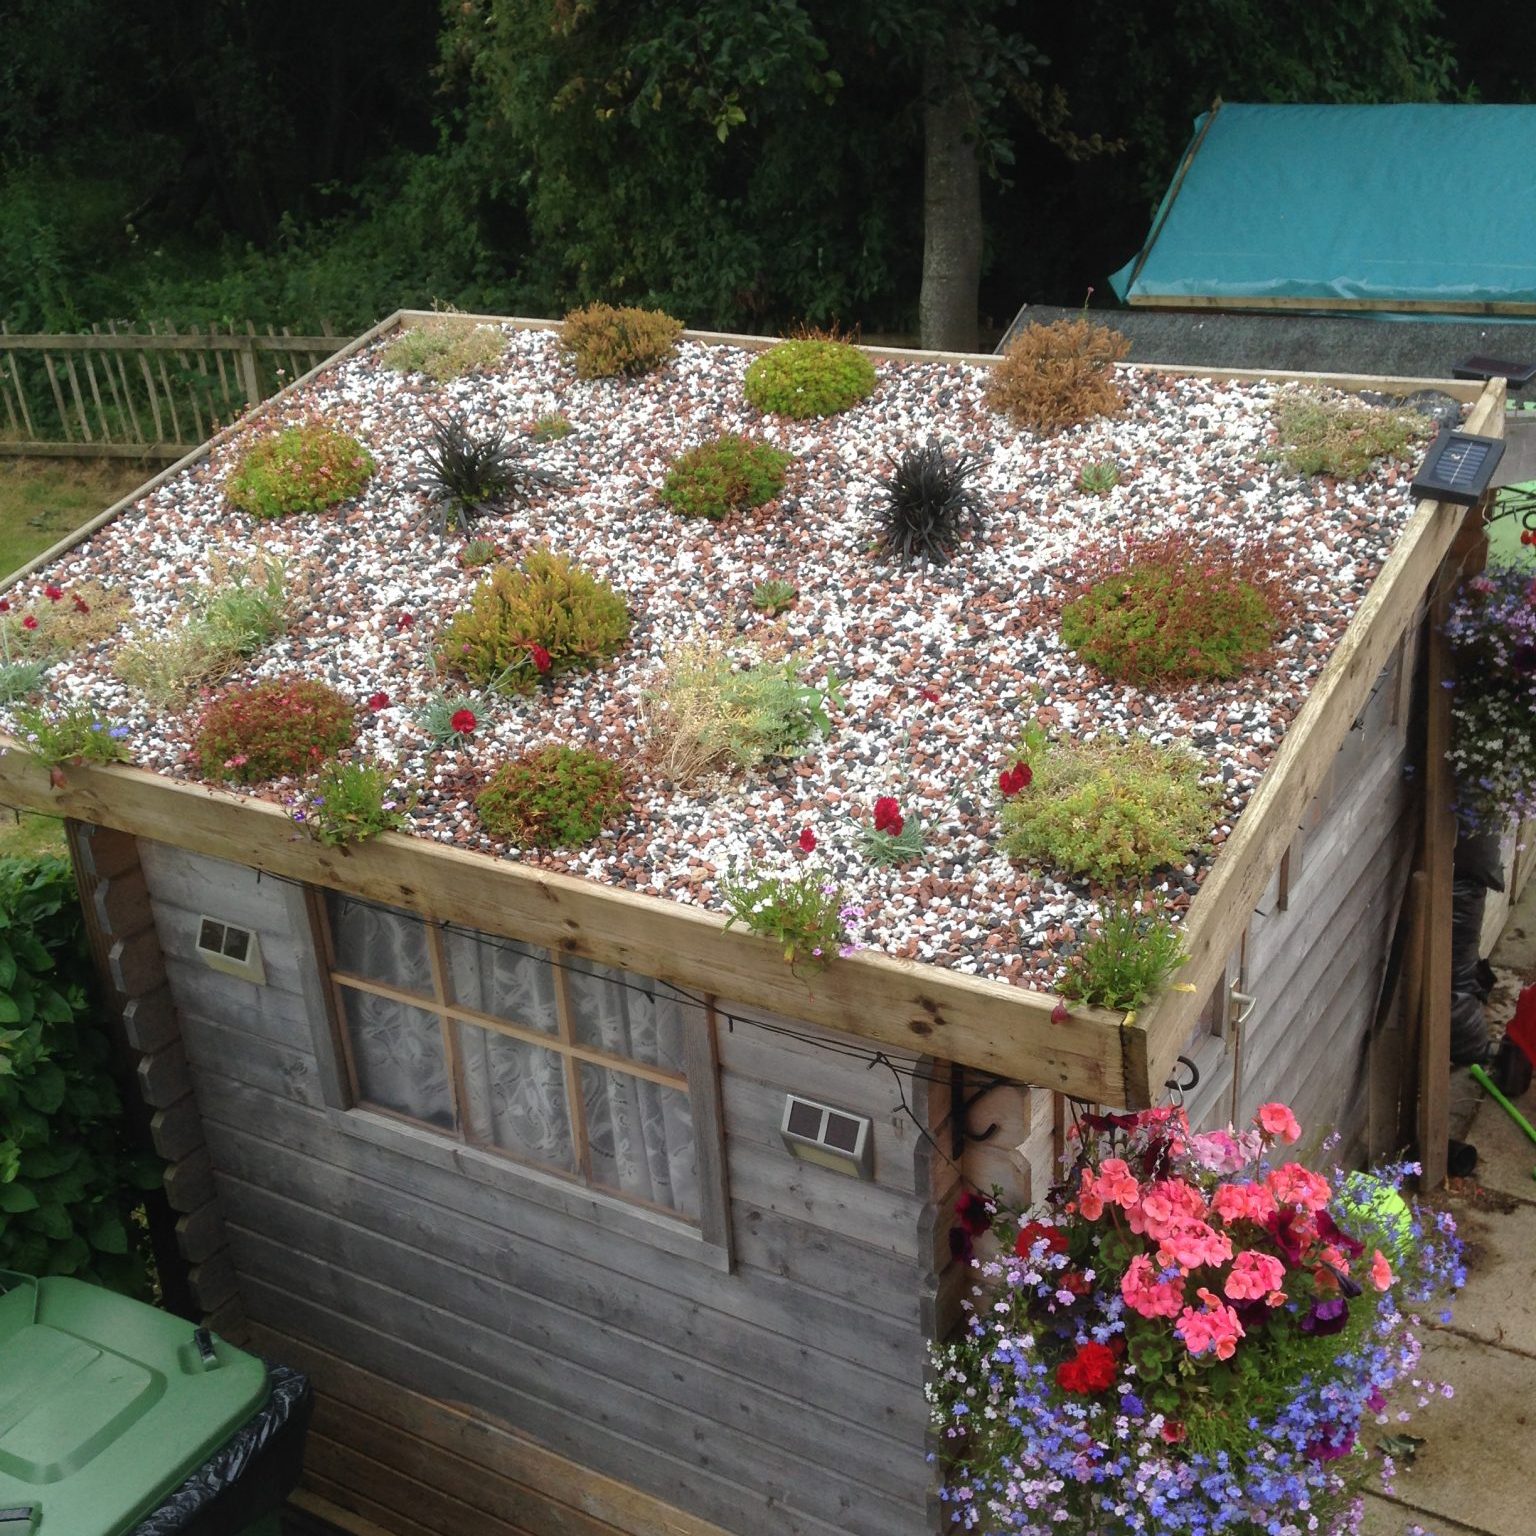
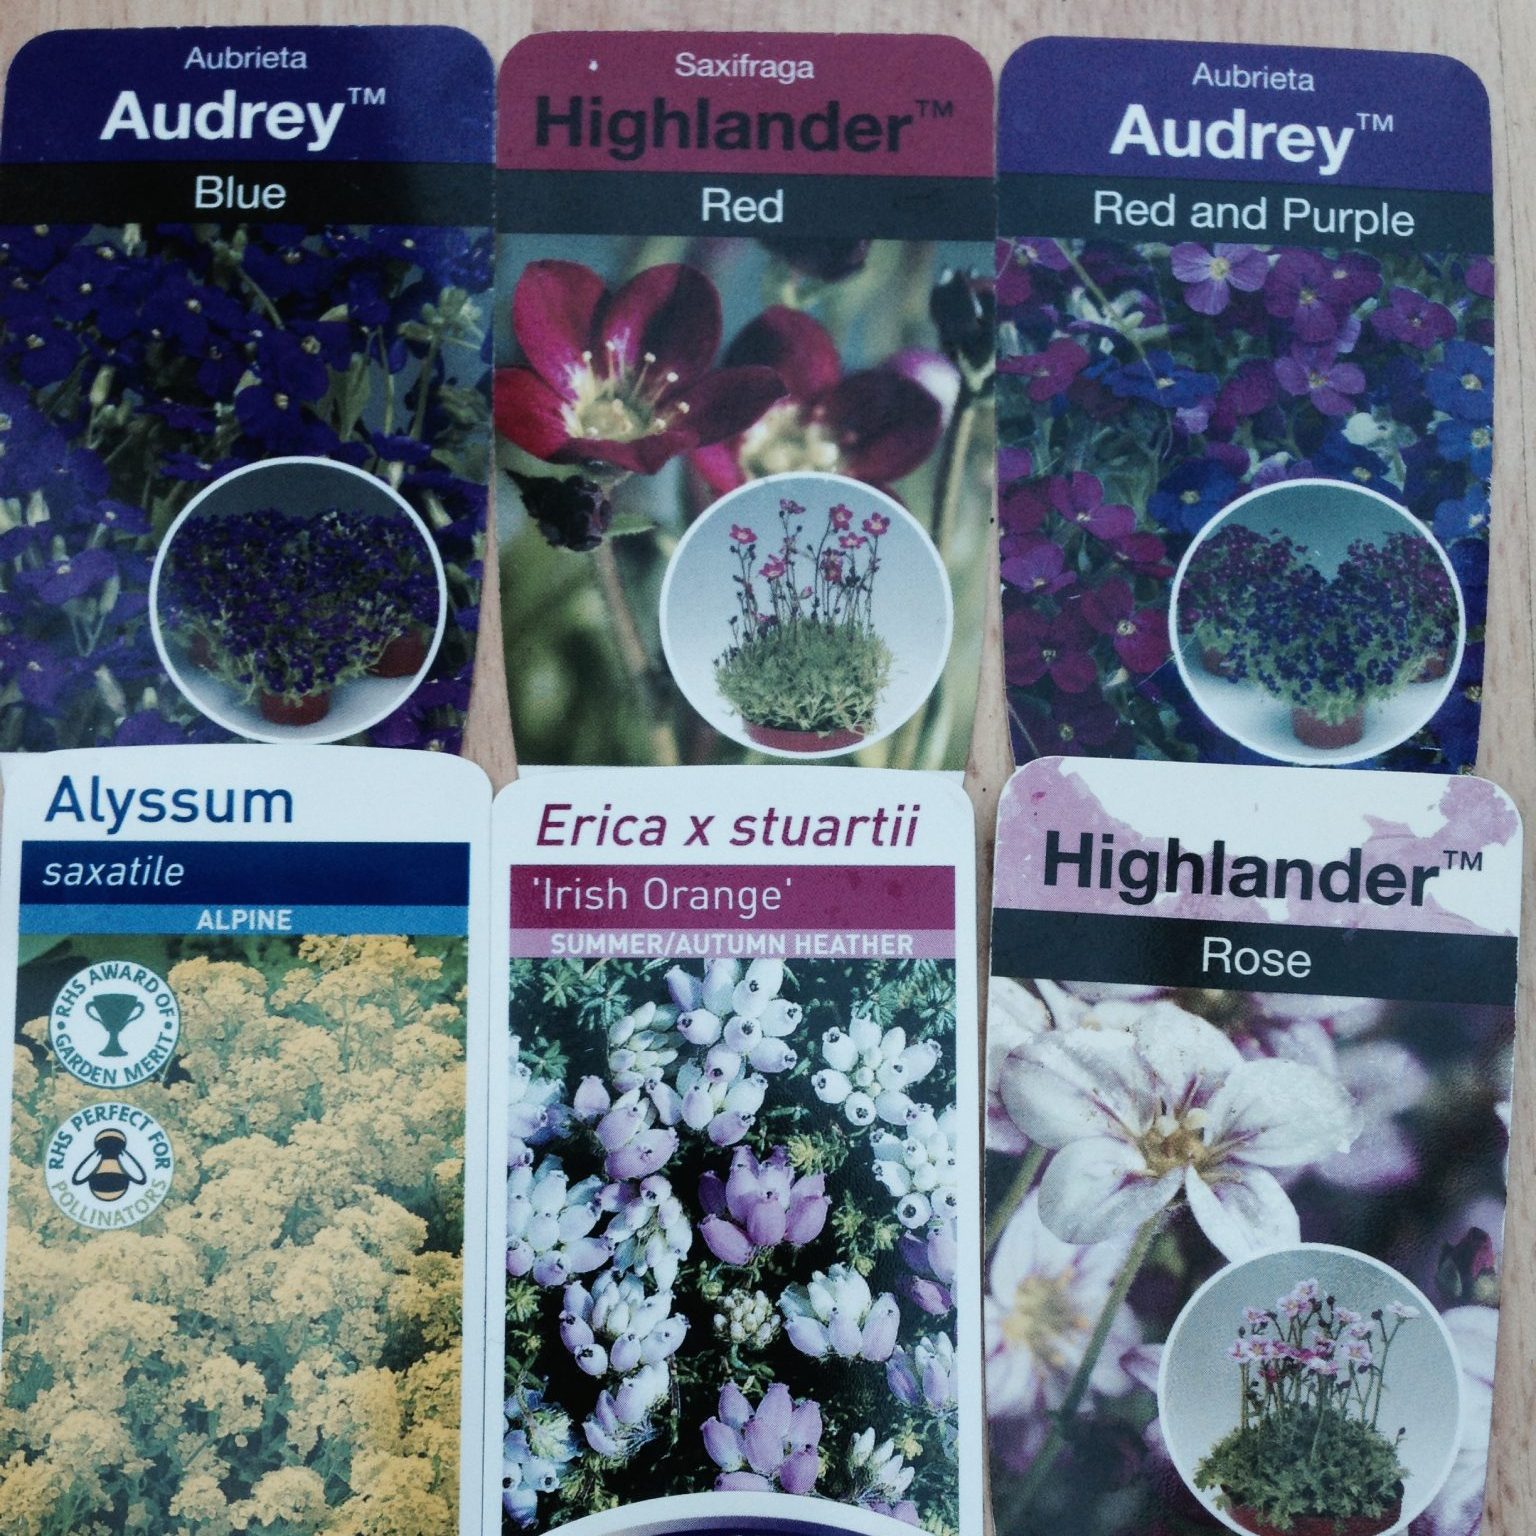
Next was the plants. When spring finally arrived I purchased approximately 150 plants in 9cm pots to cover the 4m x 2m roof. They were mainly alpines, saxifrage, a few sedums, heather, Primula ‘Wanda’, and also some aquilegia. The plan was for the plants to grow and create total coverage of the area – no soil was to be left exposed.
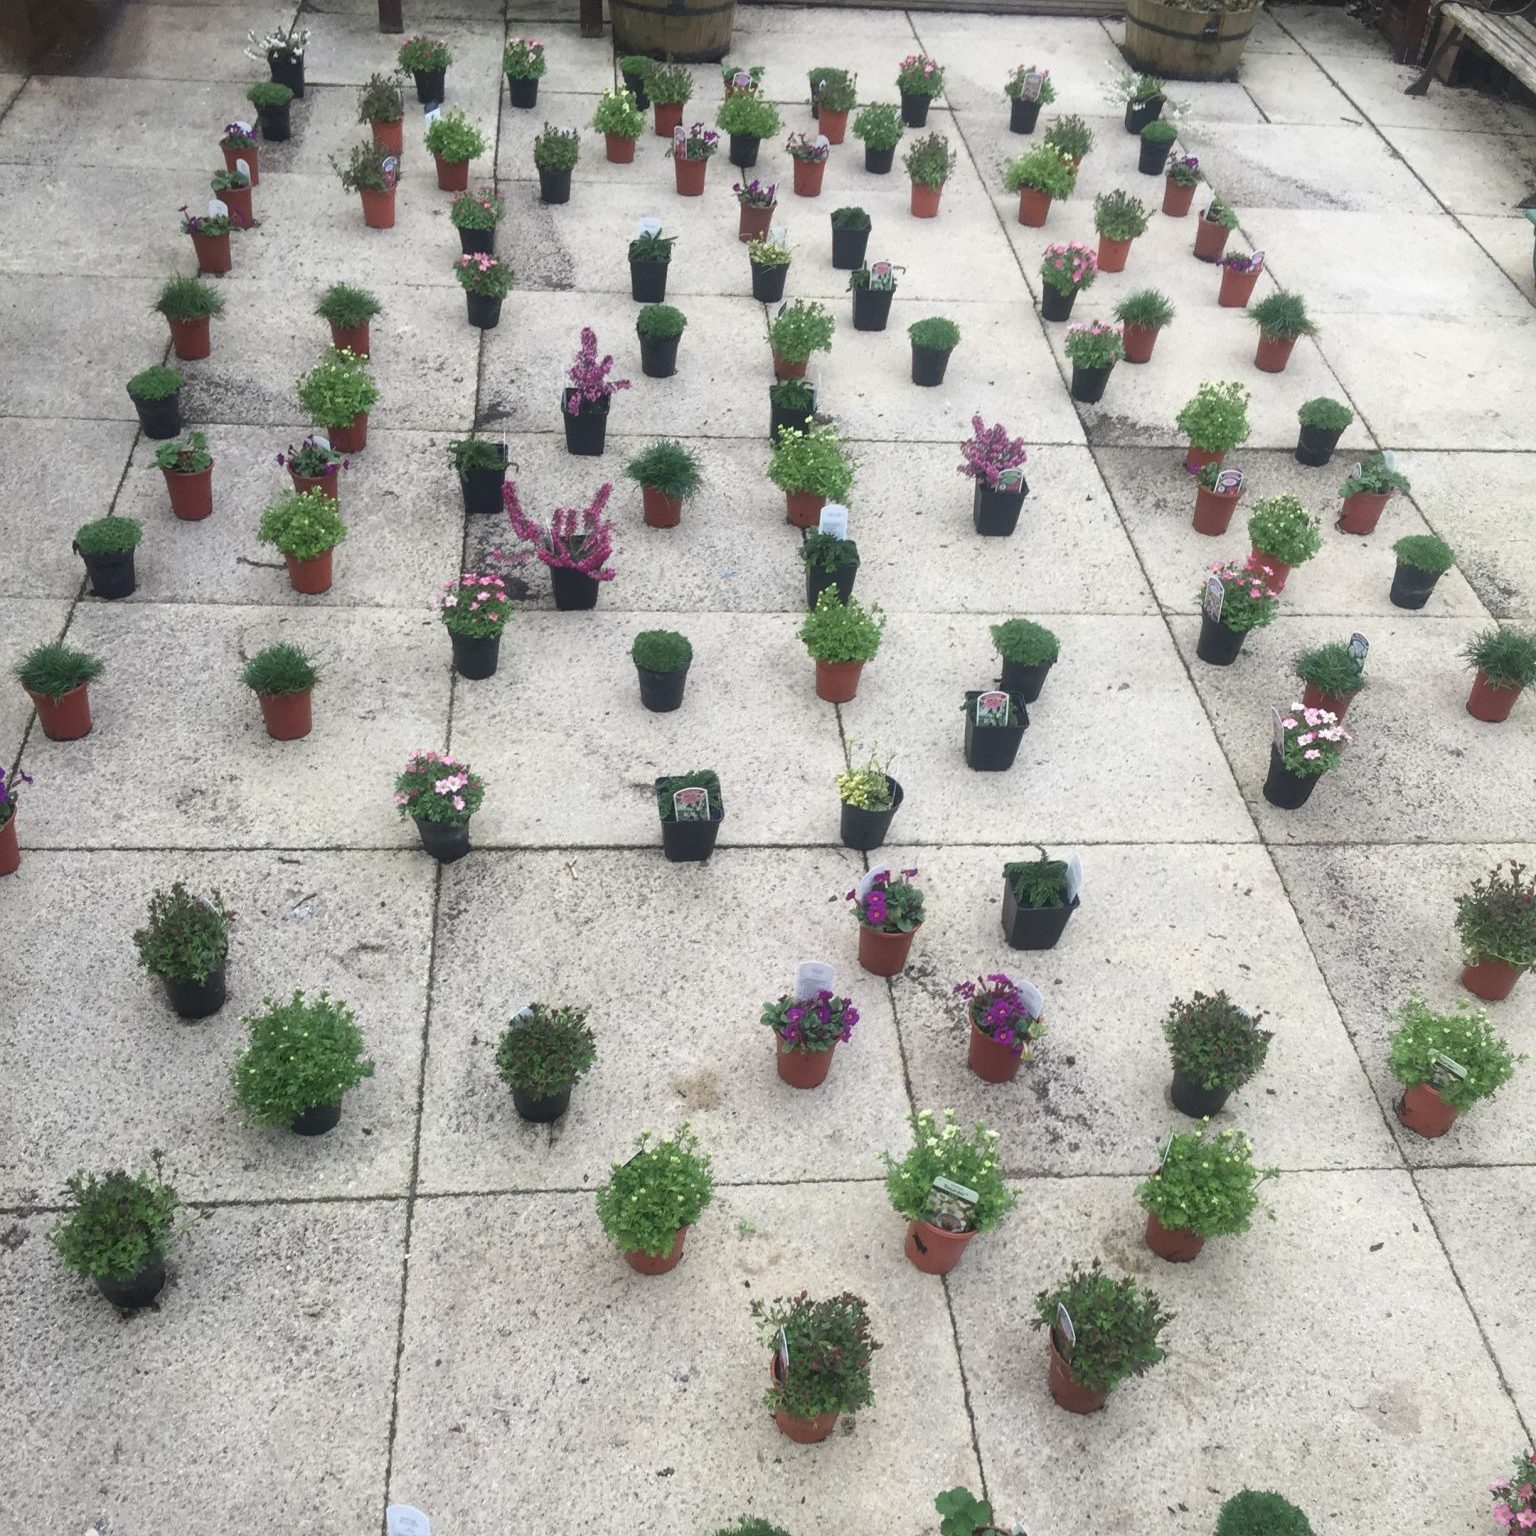
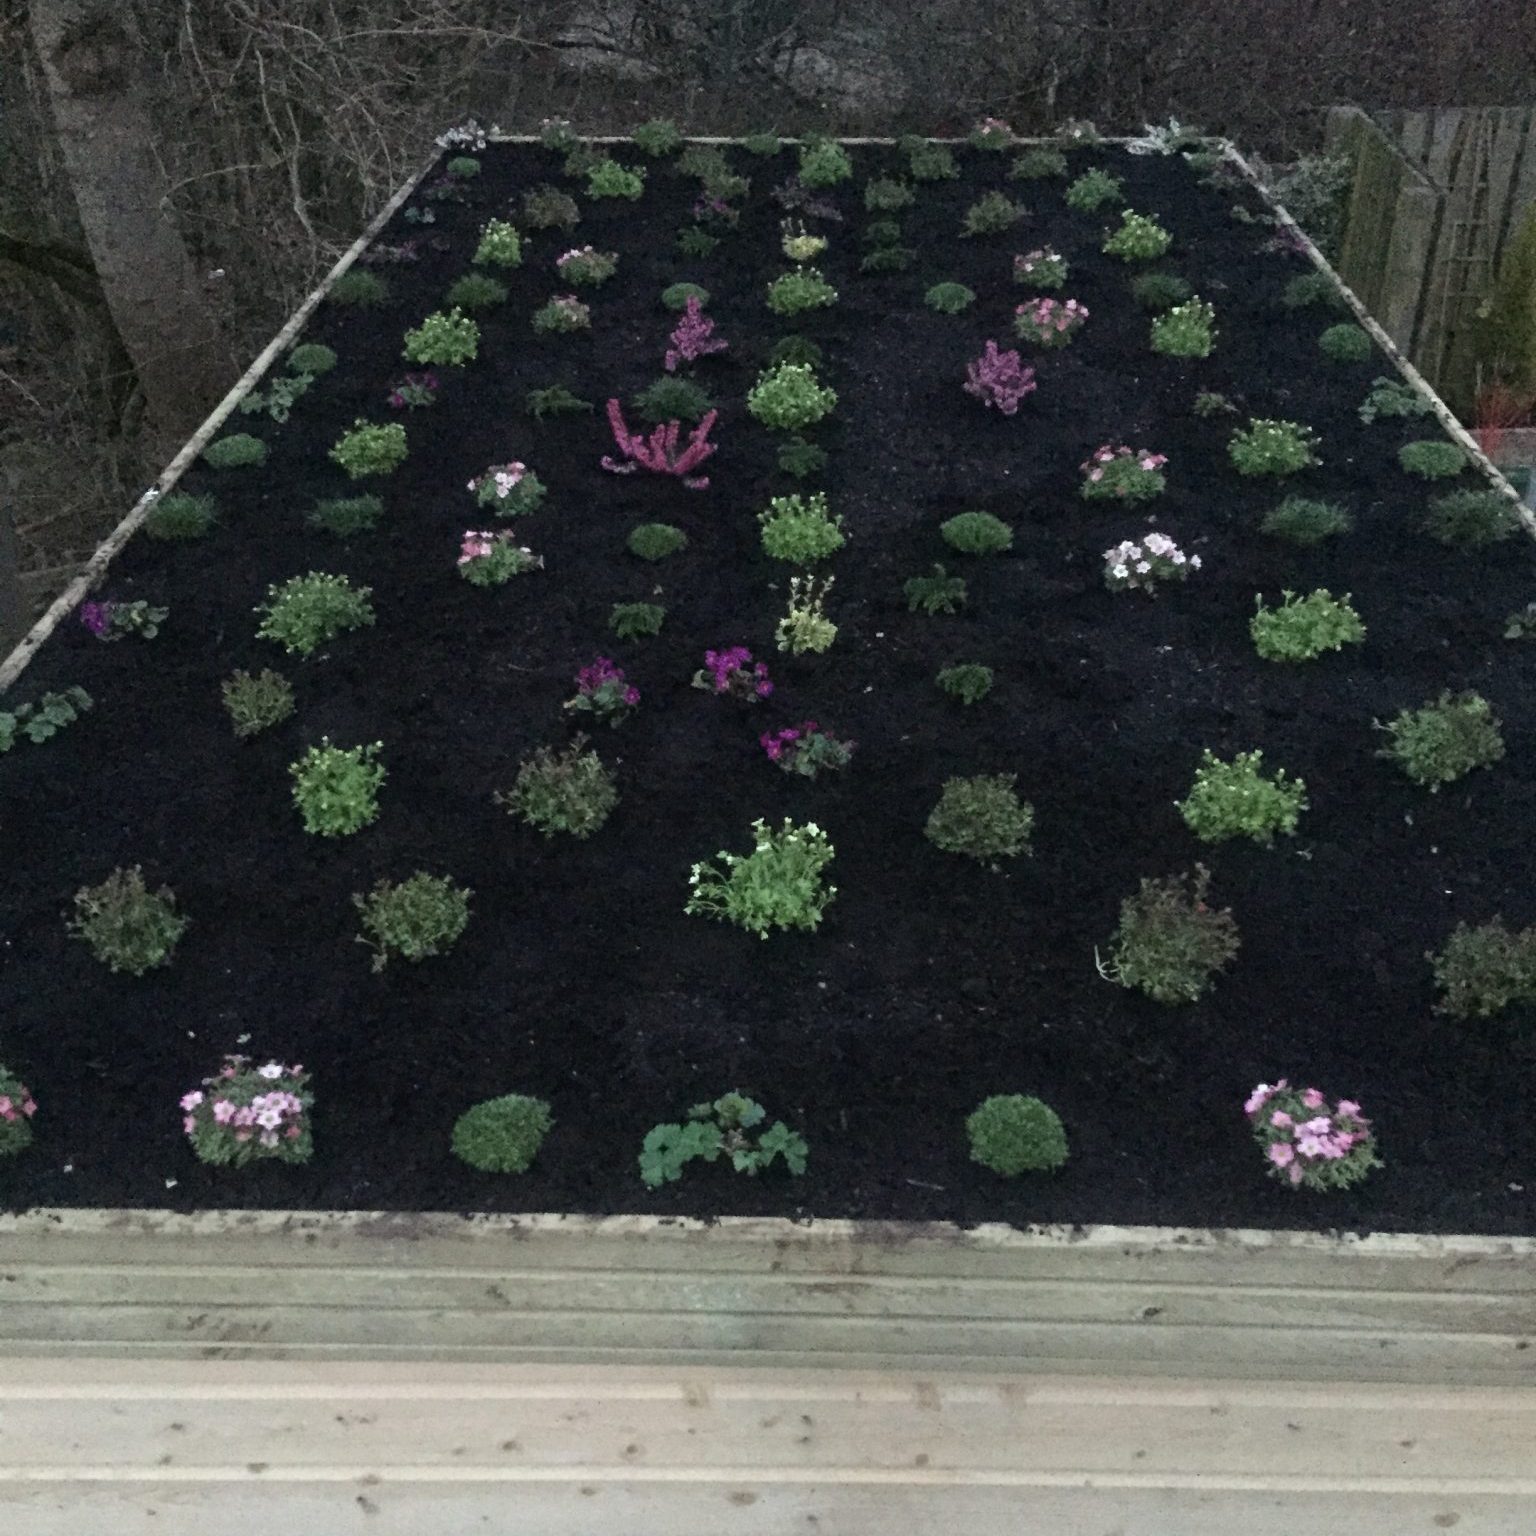
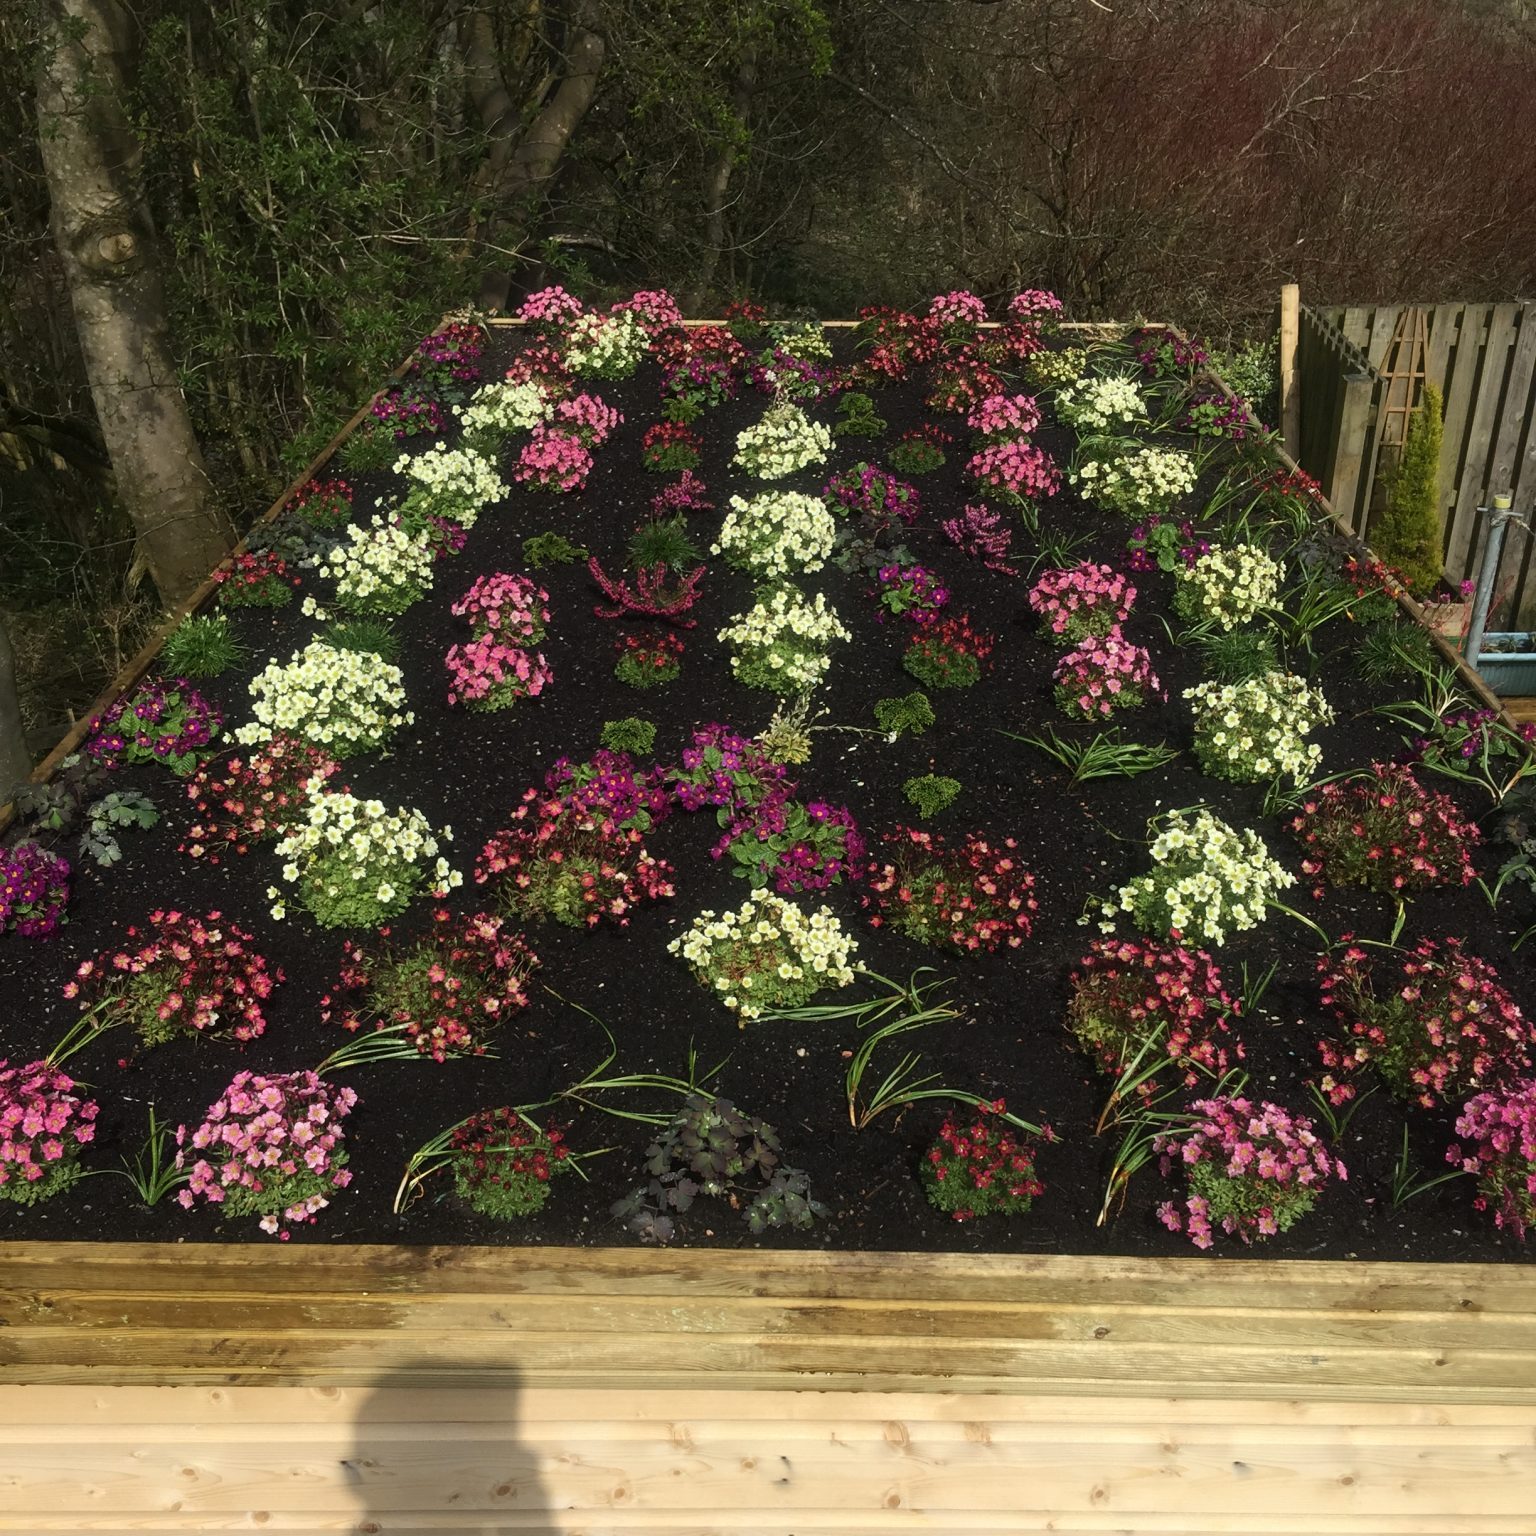
The plants were planted in March 2015. You can see from the photos how much space there was initially between each plant. The plants would form clumps of about 3 times the size of their original 9cm potted size. By the time we were in June there was a colourful spread of plants on the roof.
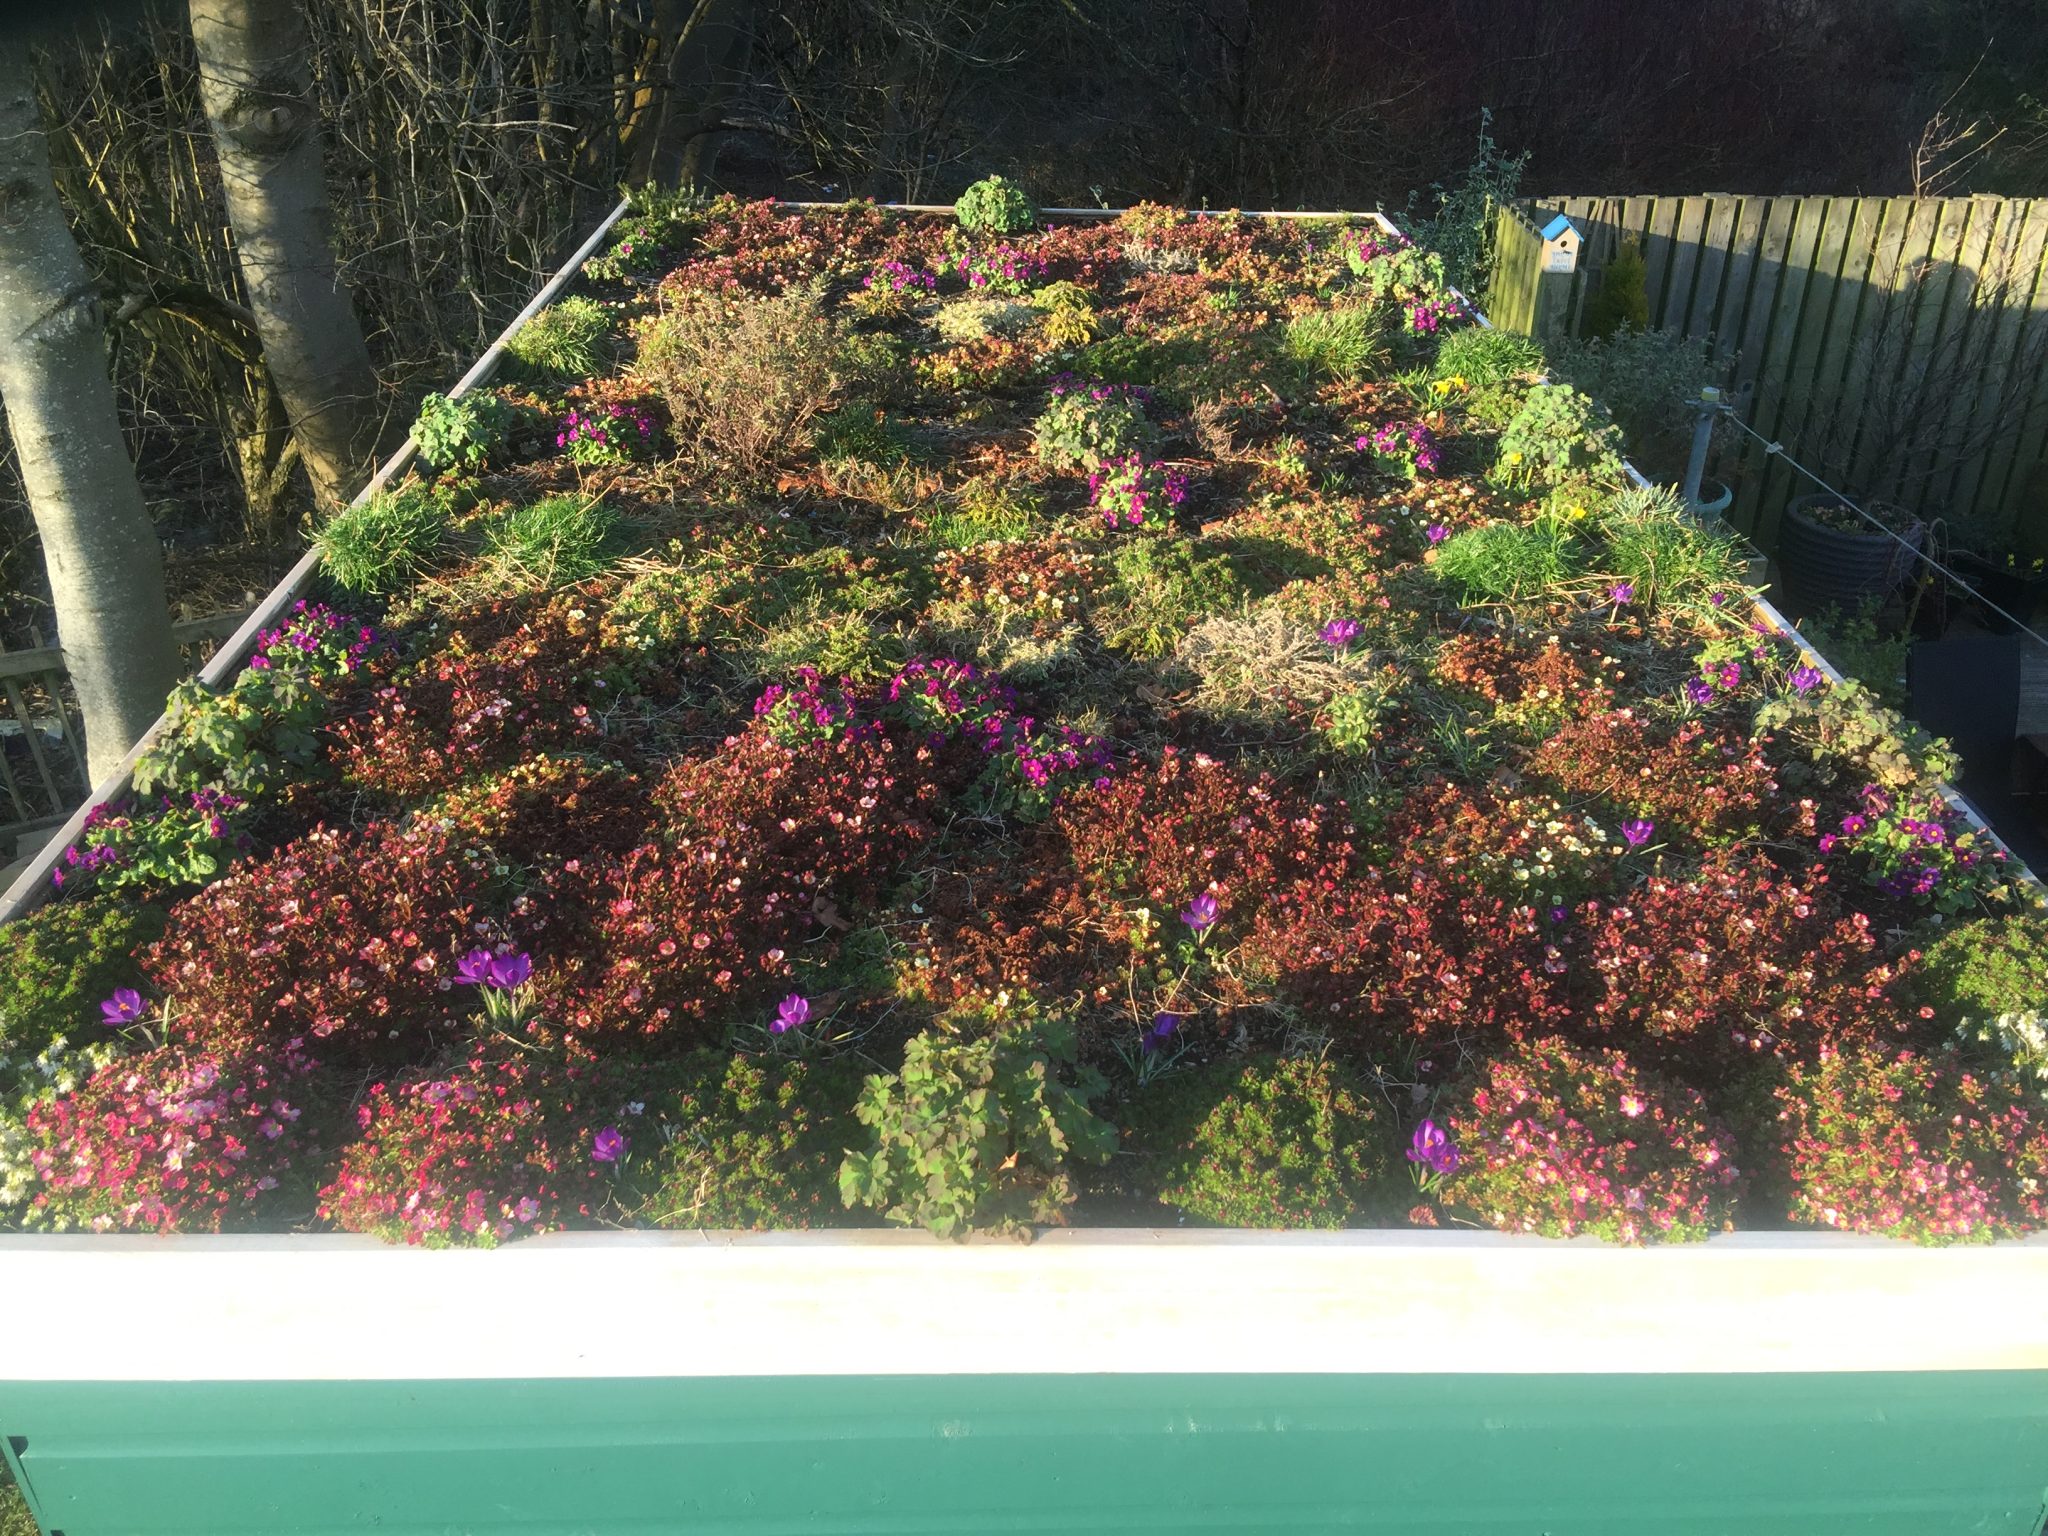
That first year my newly planted shed roof garden exceeded all my expectations. I had achieved what I had set out to do. There was a riot of colour from early spring through until August. Sadly, all things come to an end, and by the time we hit autumn most of the plants had finished their display. They needed a rest, and they went to sleep for the winter. I still had good green coverage on the roof, so I was a very happy gardener. I also added crocus, snowdrop and dwarf daffodil bulbs.
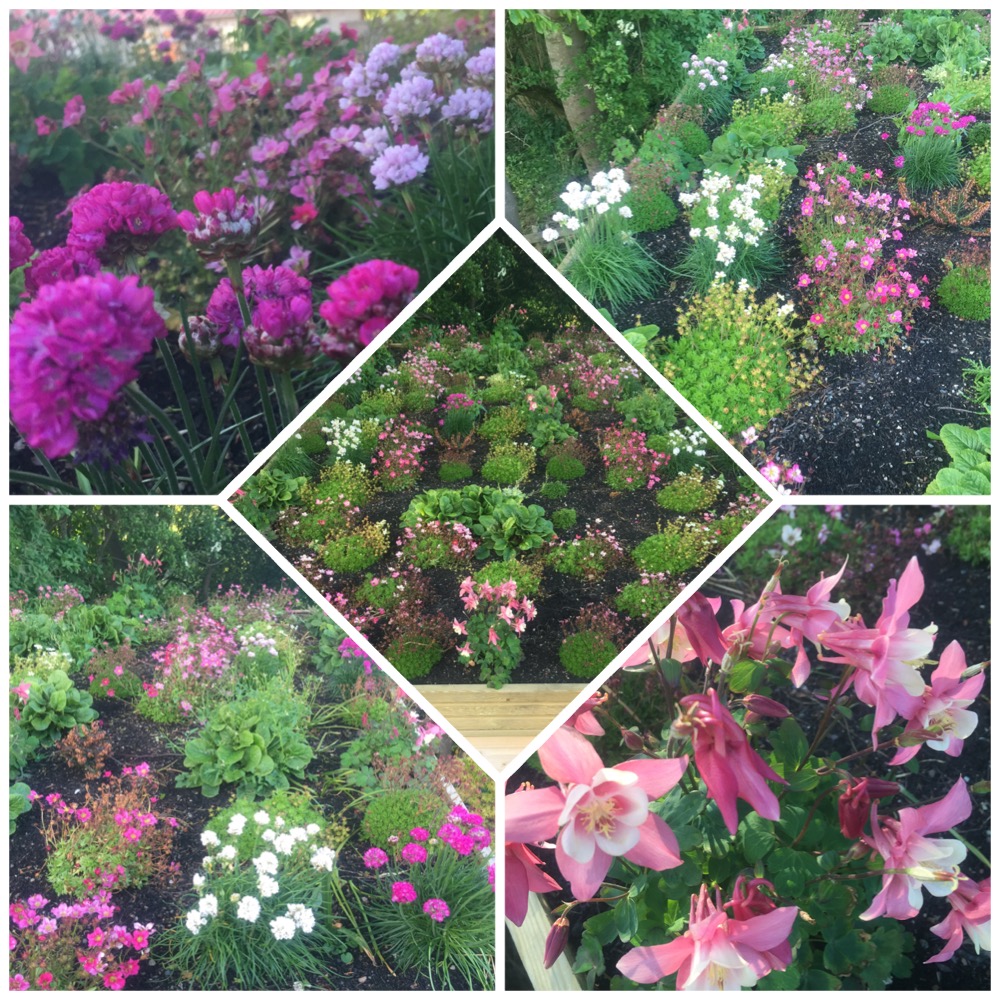
Spring 2016 came and I was excited to see the bulbs I planted in autumn appearing on the shed roof. I also added some plants to remind me of my late father who had passed away before we set up Mr & Mrs Gardens Limited. I already had a large planter in the garden dedicated to him, and I wanted my Dad to share in the pride I had in the roof garden. I added forget-me-nots in the traditional blue, together with a pink and white variety. I also transplanted a sedum I had in my Dad’s planter a variety called ‘Dragon’s Blood’. It absolutely thrives on the roof garden and gives great coverage even to this day (December 2019).
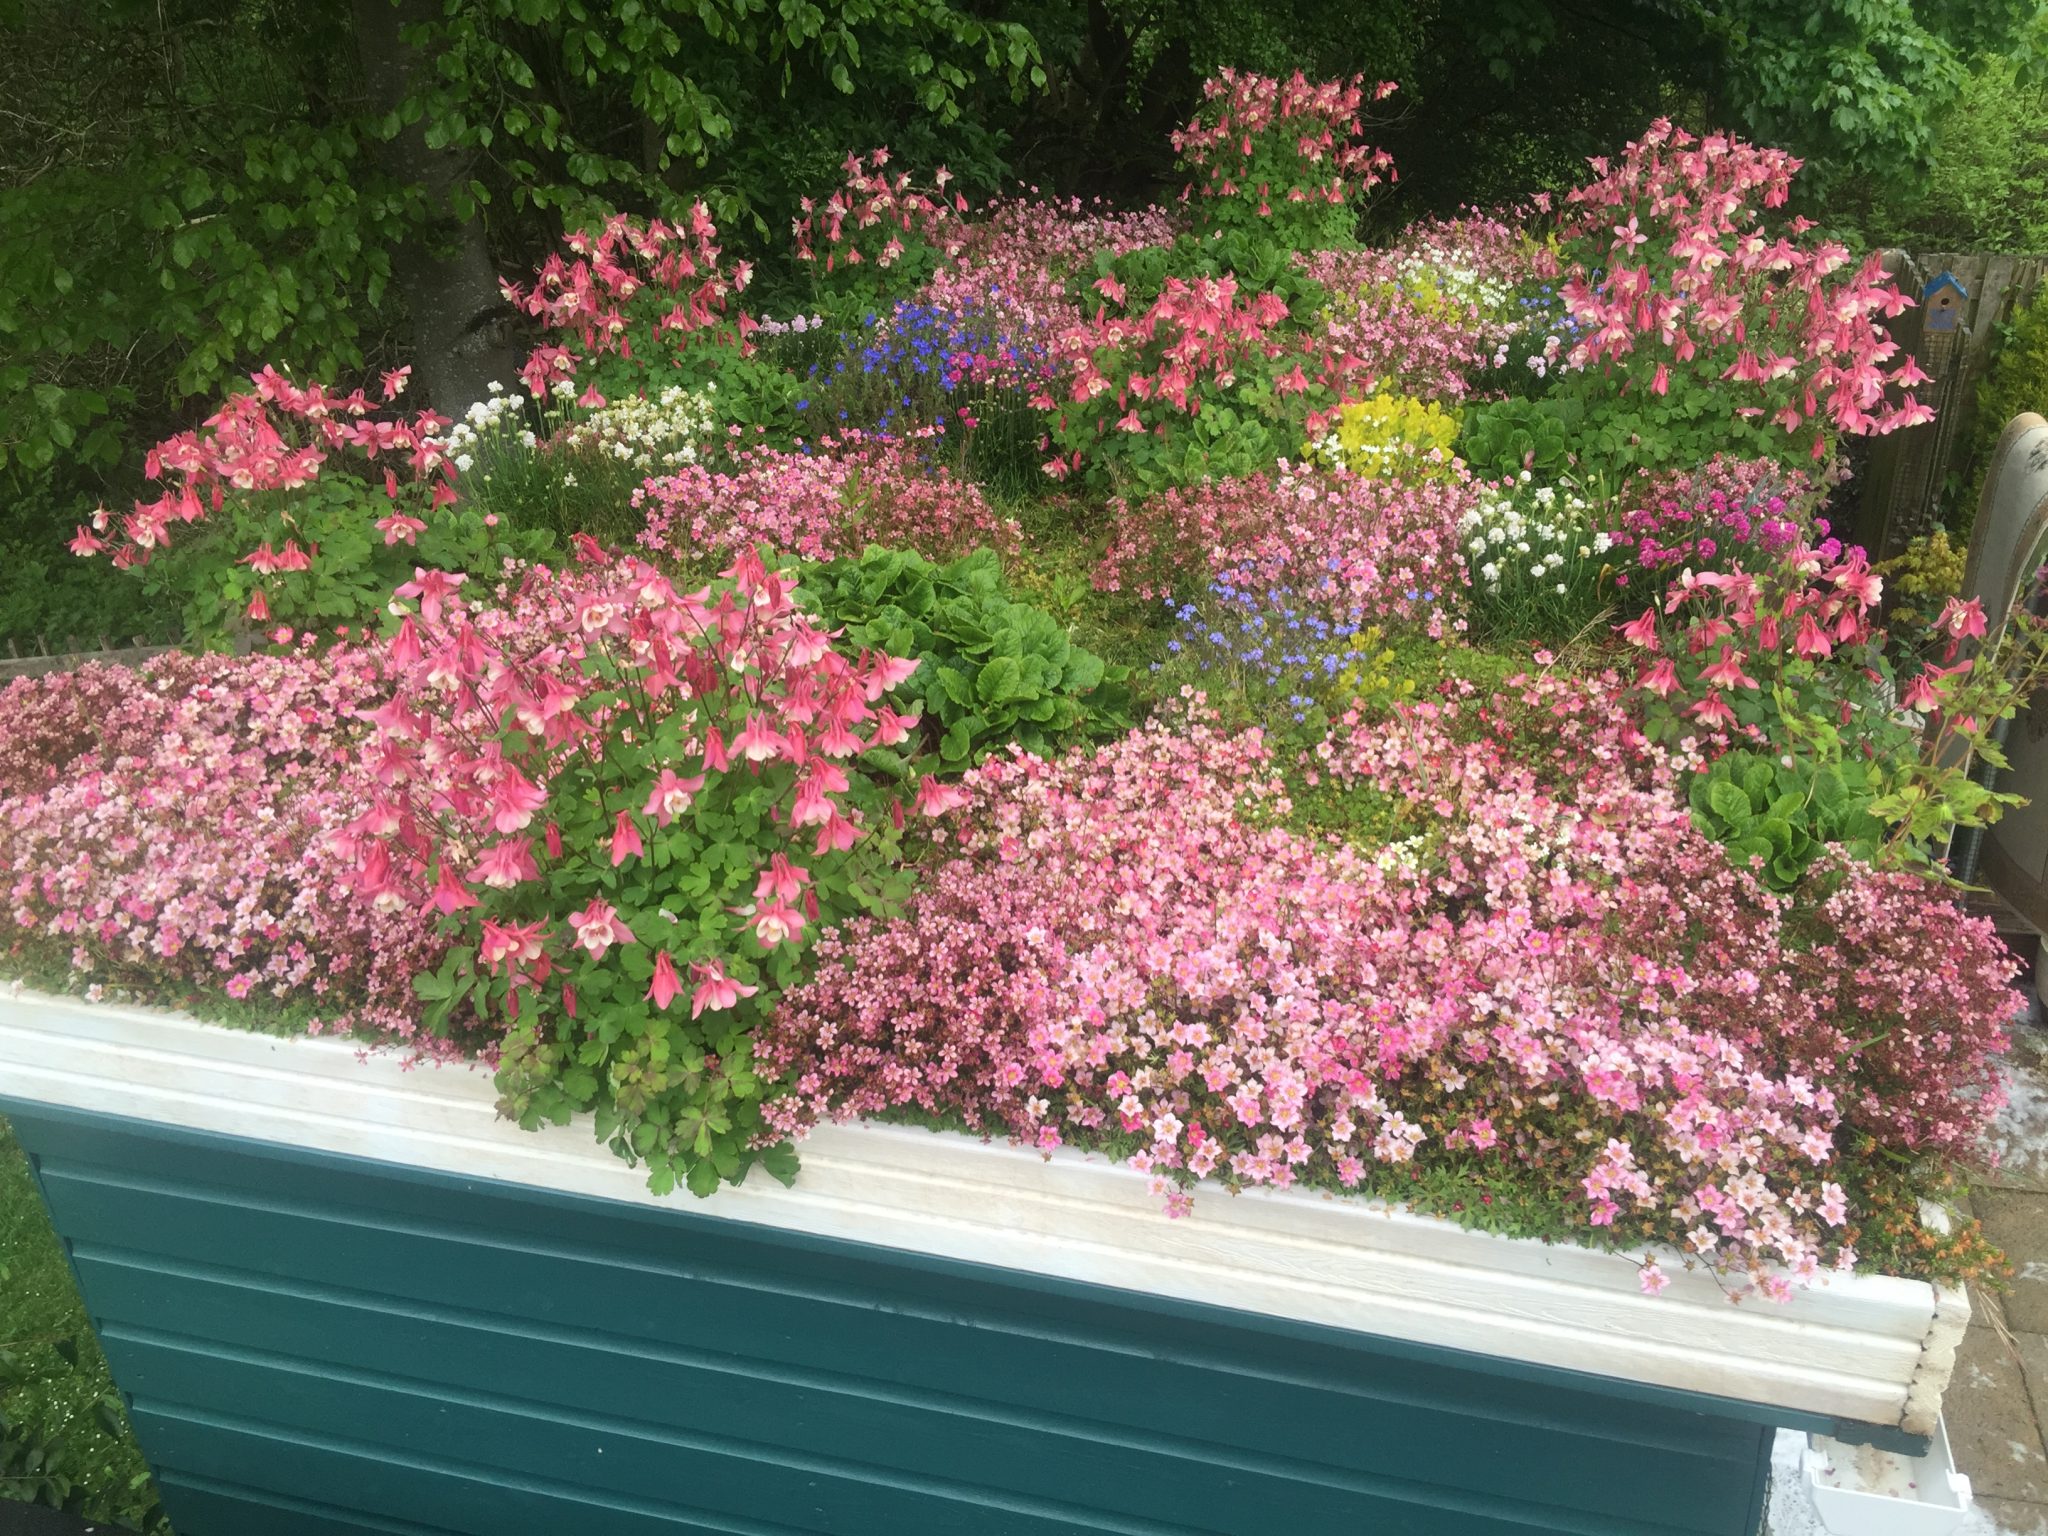
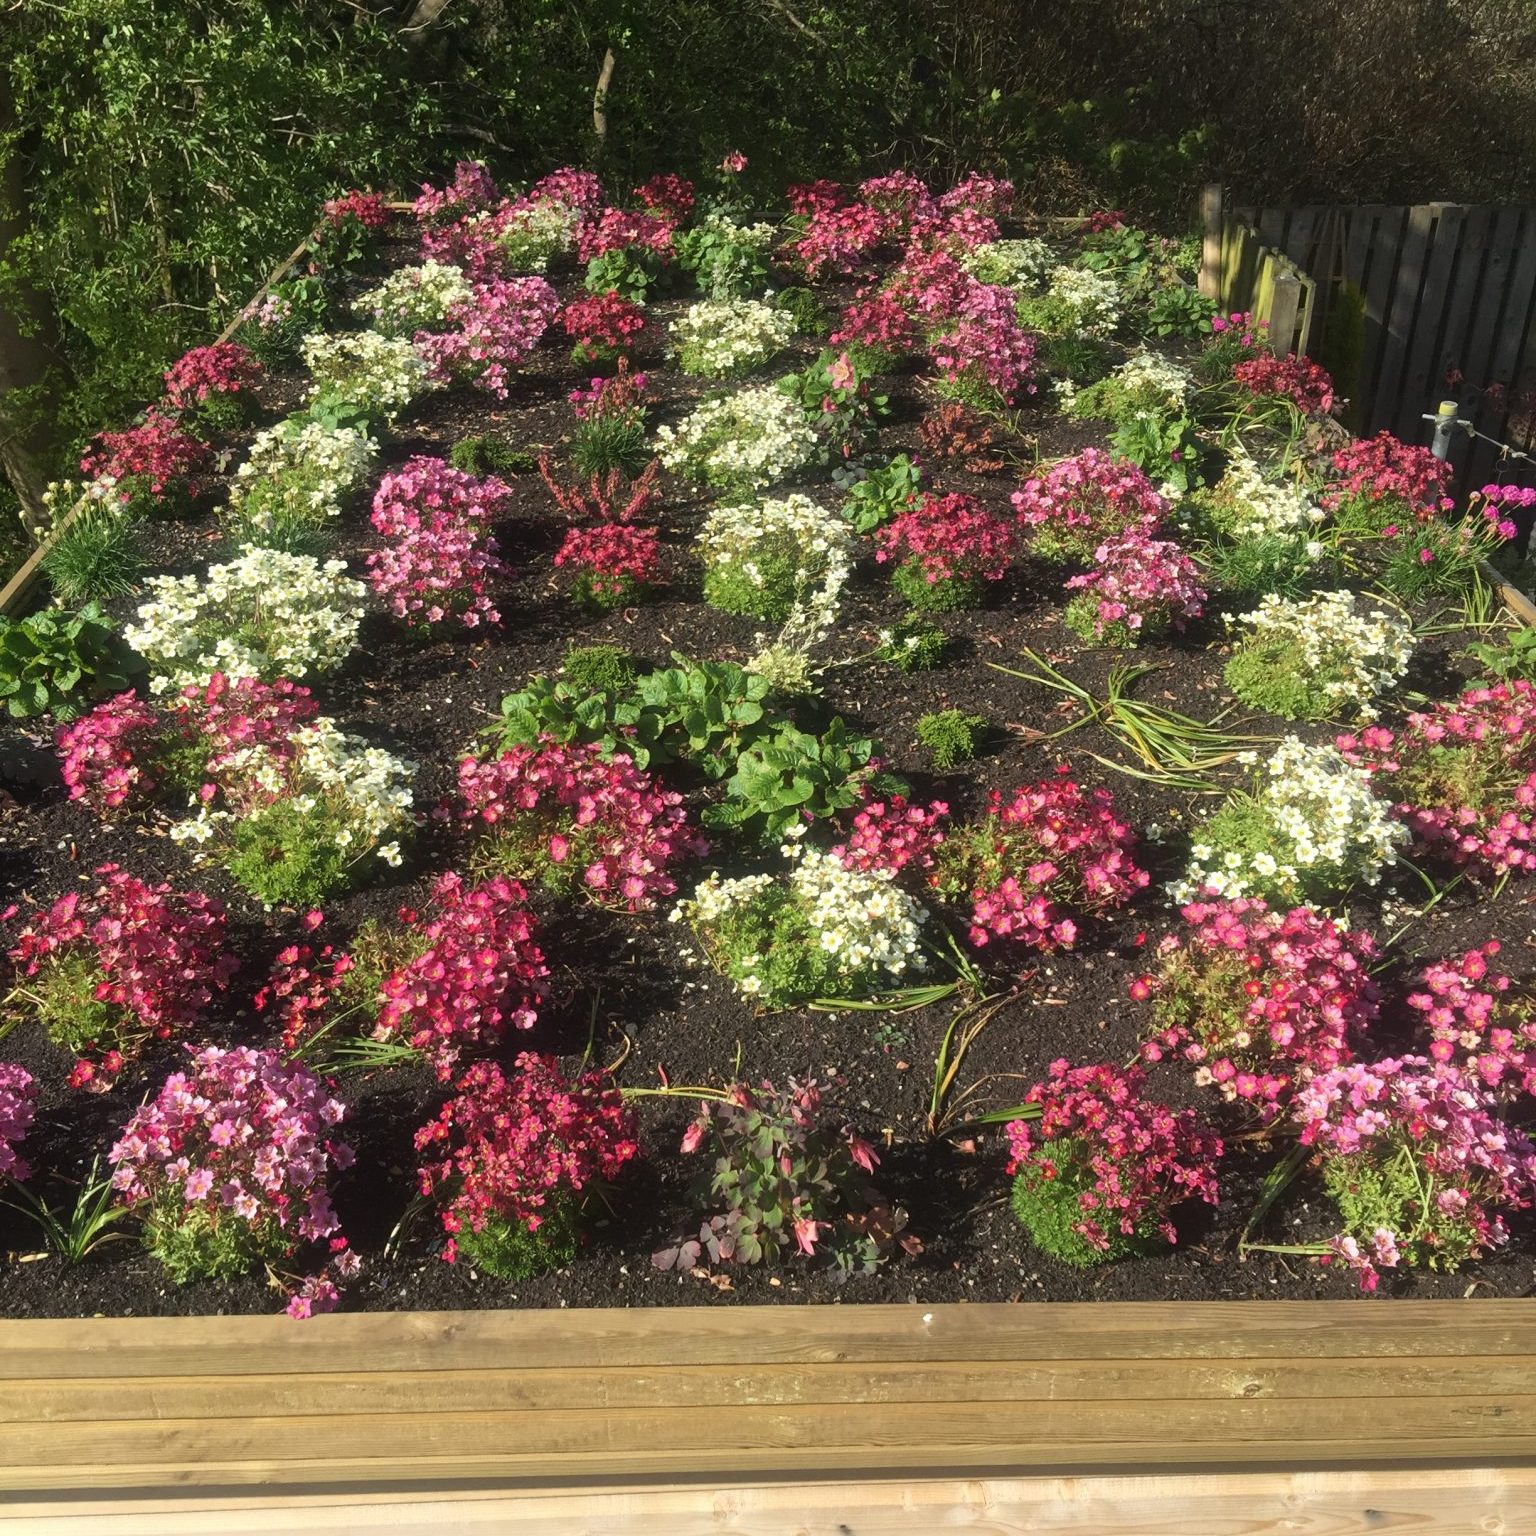
By the time May 2016 arrived, 14-15 months after planting, the roof garden was completely covered in plants. There was insects and bees buzzing around, and I was delighted I made the decision to choose plants as a roof covering rather than standard roofing felt. What a difference it made to the garden. I think it’s beautiful. What’s more, I know my Dad would be really proud that his special plants are up there too. As I often say to our customers, wherever possible, choose a plant that reminds you of a special someone, or a special place in time, or a favourite colour or scent. That way you will enjoy looking at them and you will enjoy looking after them. It’s a wonderul feeling.
There you have it – my shed roof garden from creation through its first two years. The roof garden changes through the seasons and from year to year. Some years one type of plant thrives (like the sedum), and other years another type of plant struggles (like the primula in the long hot summer of 2018). That’s just how it goes in a garden. Don’t worry about losing a plant. A year doesnt go by without a garden casualty. Ask any gardener, even the best of them, and they’ll tell you of their gains and losses.
I would encourage anyone to give shed roof gardening a go. Not all shed roofs will take a roof garden. If the pitch is too great, the plants will struggle to hold onto water. And, of course, you must be absolutely certain your shed roof is strong enough. If building your own shed seems daunting there are specialist shed and garden room suppliers who will provide you with a shed purposely designed to accept their own sedum roofs that come in already established long mats of plants. They’ll even design, deliver and build the shed for you, and apply the sedum roof matting. You could check out ‘Enviromat’ for a provider of sedum roof matting www.turfonline.co.uk/enviromat. There’s lots of information about sedum roof matting products, installation and ordering on their website. Thank you to Angela Lambert for providing me with this very useful product information.
If you would like to follow the progress of our shed roof garden you can follow us on our social media channels where we often post photos of our shed roof throughout the year (click on any of the social media links below). We’d love to hear what you think of our shed roof garden. Feel free to leave a comment below, or on social media.
Best wishes. Happy gardening.
Thank you to the Scottish Rock Garden Club for encouraging me to write this blog. The SRGC was founded to promote the cultivation of alpine and rock garden plants. If you’re not sure about creating a shed roof garden, you can always create an area in your garden for alpine and rock garden plants. Get inspiration from the SRGC at www.srgc.net
I found this very informative and looked gorgeous
Superb blog, Michael! And very wise and useful warning about load safety for the structure. Your efforts have really resulted in most attractive gardens on a new plane. Well done – we’re so pleased you have found the time to write about this!
Thank you, Audrey. That’s very kind of you. I really appreciate you taking the time to post a comment. We have a stair window that overlooks the rear garden. I often find myself looking out onto the shed roof at how the plants are coming along. I love it. Thanks again. Michael
Thank you for those kind words, and thank you for encouraging me to write the blog. I was determined to not let another year go by without writing about the shed roof garden. I think I’m going to add some more alpines in spring to celebrate. Thanks again. Michael
Hi Michael,
What a great blog, very informative and lovely to read. Seeing all the photos is also helpful and motivating. Your roof garden looks wonderful. It’s a good way of absorbing rainfall into a garden environment.
Louise
Hello Louise. Thank you for these lovely comments. They are very much appreciated. Yes, it does feel good knowing the plants on the shed roof will get a good watering when it rains, plus we often put a watering can underneath the drainpipe we fitted to collect any run off from the guttering we fixed to the lower side of the shed. Thanks again for taking the time to comment. Best wishes. Michael
I really enjoyed your blog, Michael. I am currently building my own green roof on a rabbit hutch. Could you provide more details about the water matting? It would be really useful to know a brand that you would recommend. Thank you.
Hello Harvey. Thank you for reading the blog. I purchased the water matting from the website ‘Two Wests & Elliot’. They have a range of plant growing equipment and materials. Thanks again. Michael (Mr & Mrs Gardens Limited)